Using a very detailed Artillery Prep and Supply Rules originally established back in the 70s and 80s, and later edited and further developed in the last four years, the battle begins. The view has now changed to from the north. Beatrice actually had three linked hilltops labelled B1 (north or bottom of photo); B2 (top-right); B3 (top-left) and B4 (mid photo, although this position is sometimes shown as part of one of the other). Bunkers are those square/rectangular posts covered with sandbagged roof. Some have already been penetrated and uncovered. Note this at the lowest point of the French position shown near where the road (RP41-Route Provinciale 41) leaves the Battle Board. You can also see the approach trenches of the Viet Minh from both east and west. These were simply poster board outlined with the same playdough sand bags. They are easily place throughout the various games so provides numerous options.
Three Viet Minh Battalions have begun their assaults: One from the east (left), and two from the west (right top and bottom). The French Foreign Legion 3/13 DBLE consists of about 80 some 15mm figures, divided into four copies, one found on each of the positions, with Btn HQ on B4. Each Viet Minh Btn consists of about 100 figures in three companies each. Both have already suffered casualties from artillery fire. (Which was the big killer at Dien Bien Phu). The caps seen on the figures are, 1) Red=Pinned (figure can't move next turn but can shoot); 2) Yellow=Shaken )figure can't move or shoot and if contacted by enemy based figure will surrender); Green=KIA (found on heavy weapon stands with more than one figure such as mortars or MMG).
If you zoom in, you will be able to spot sections of the barbed wire breached by artillery fire...
Zooming on to B1. One French Platoon has brought the initial VM assault troops under fire. There is a French LMG in the bunker (left/center). The rules provide one dice per rifle, three for LMG, and five for MMG. You can also notice a single red dot on the VM figure to the right. I can identify each company/battalion with dot for company and color for btn. This particular figure is first company of the red btn. Companies is the smallest unit i use for the VM while the French break down to platoons.
Next we turn to B2 where all five bunkers survived the VM artillery. The leading VM company has also suffered more severely from French artillery as shown by large gaps in the assault line. Look closely and you can just spot a French MMG poking out from under the bunker roof in the right hand bunker...
The last shot taken from Turn one is now at B3. Here the VM have suffered slightly less casualties while the one of the French bunkers (top edge of position) and two gaps already show in the perimeter fence...
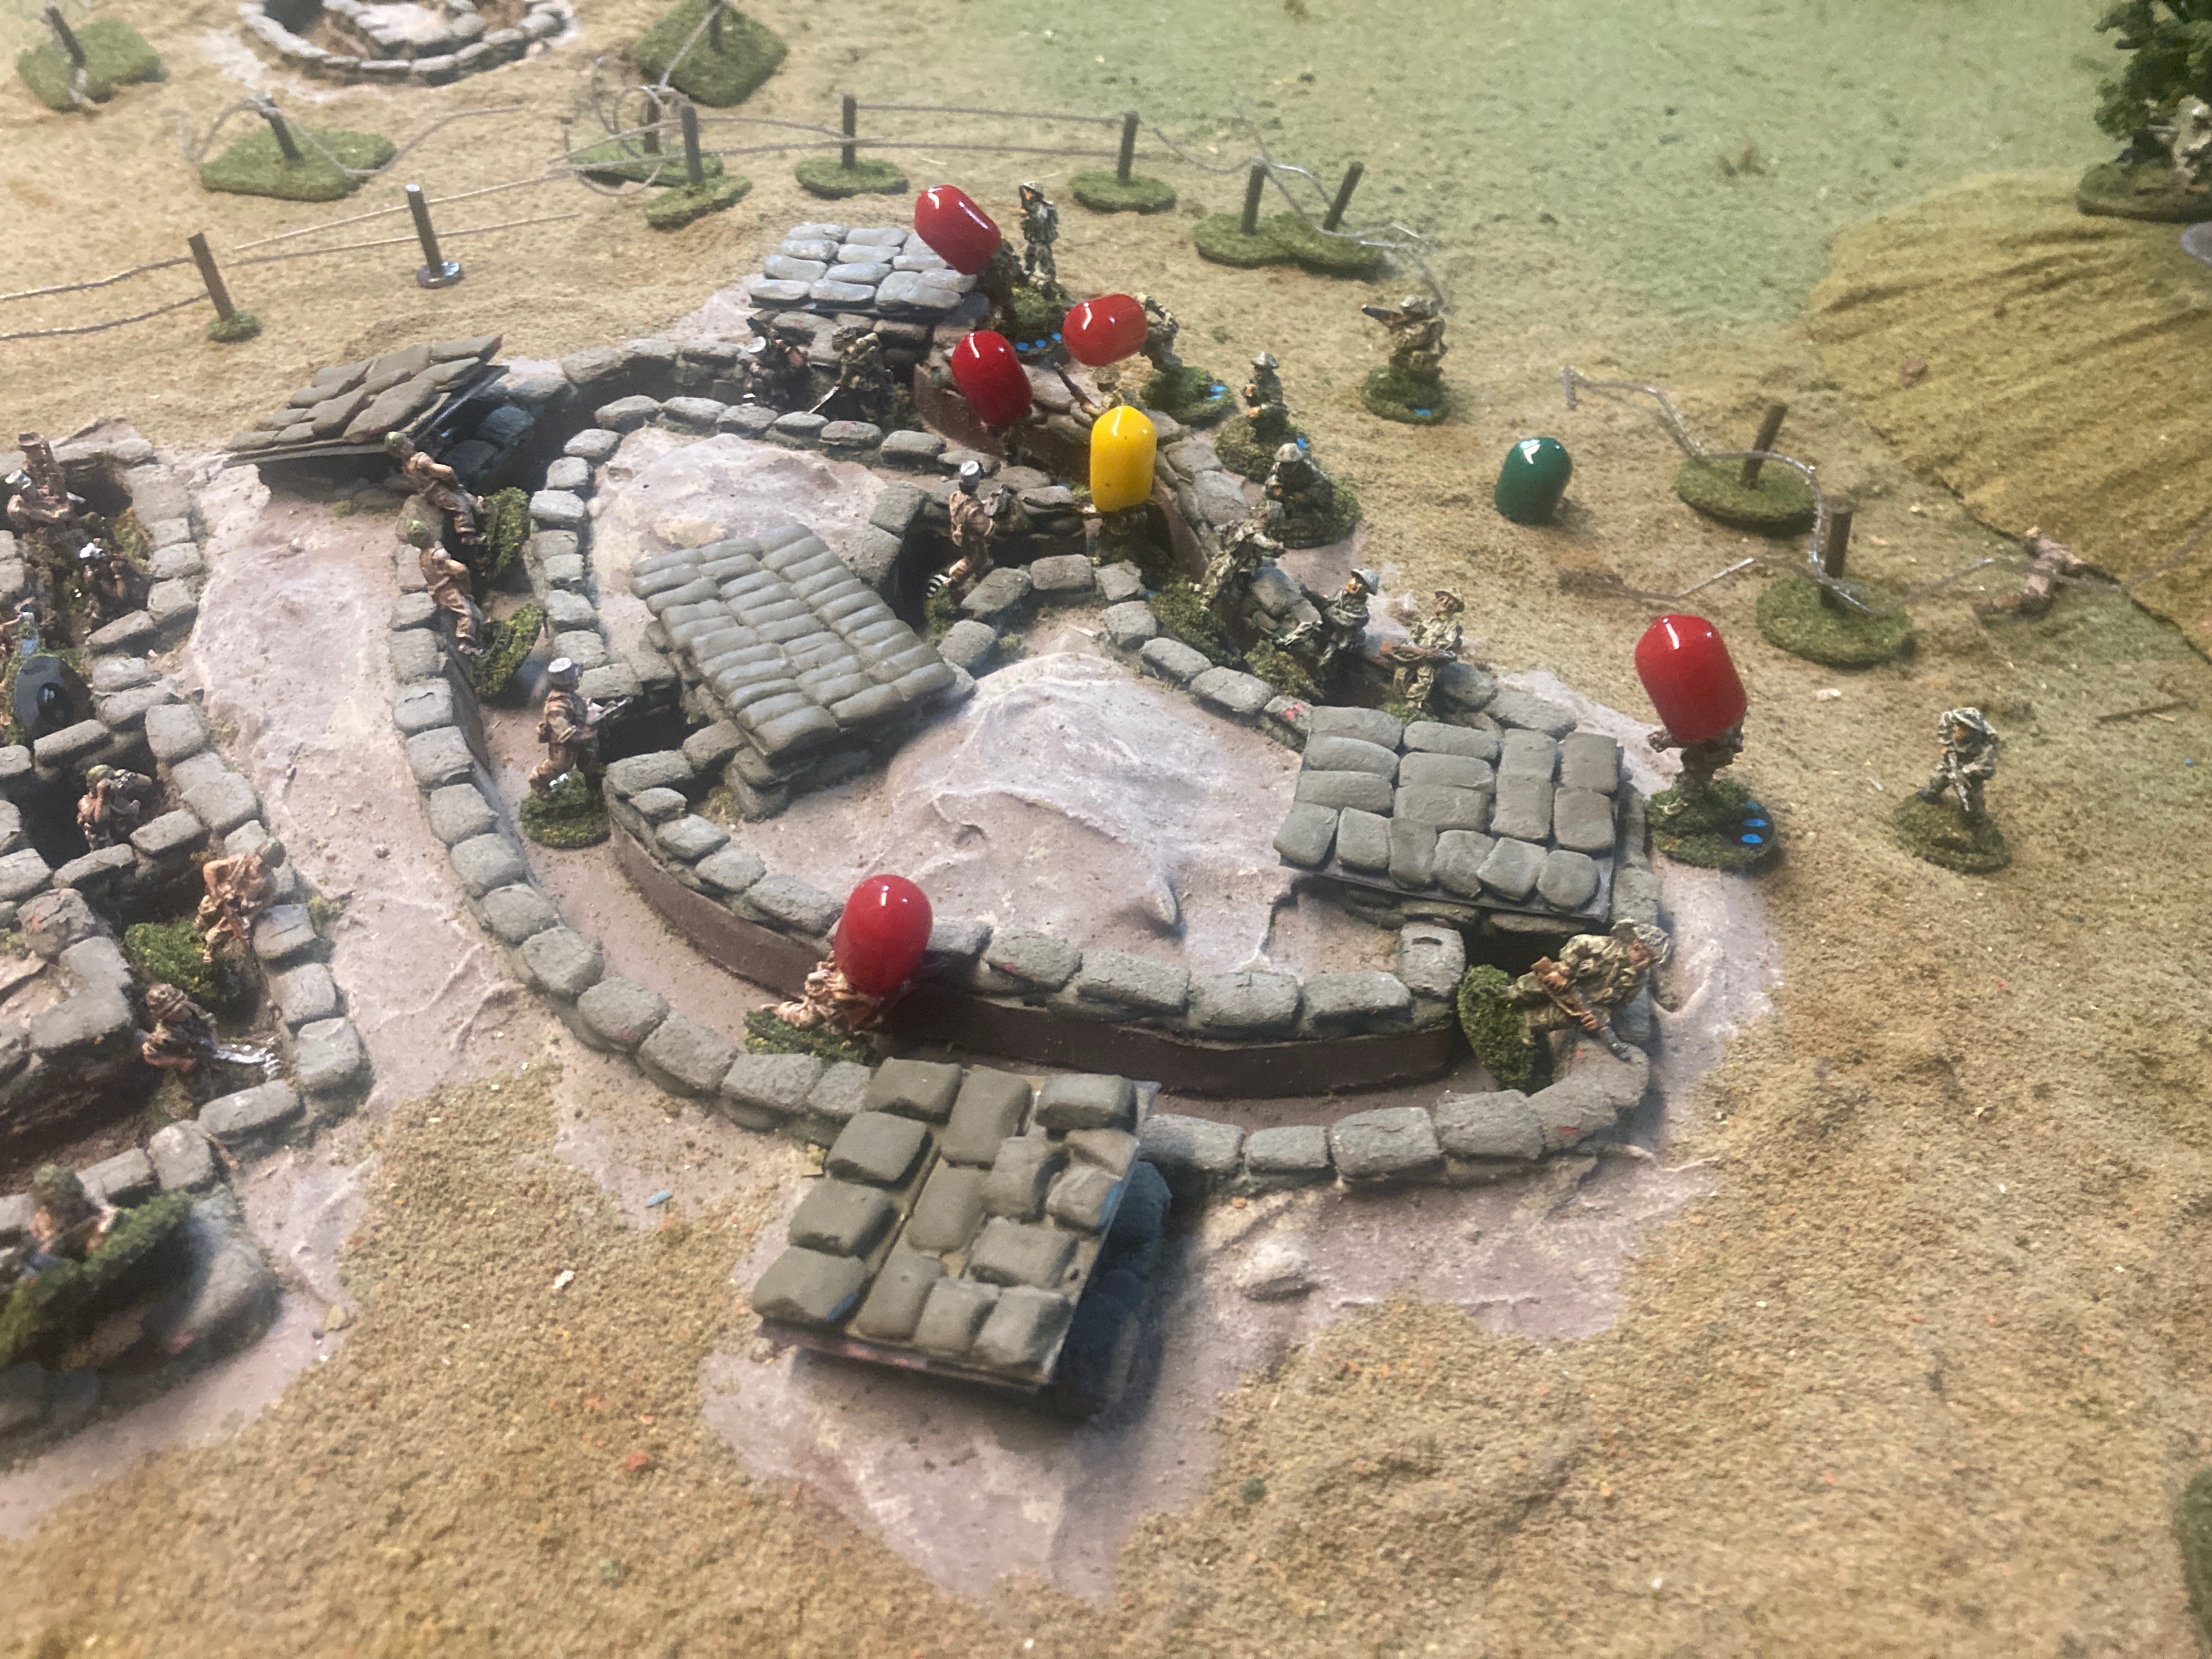
Turn 2 at B1. The VM have two gaps in the wire (VM marked with Yellow cap in one and second seen in front of bunker in top right). The smashed bunker at bottom had seen the two man company MMG crew KIA, but two Legionaires found the gun operative and have turned to gun on the VM! Notice the Legion Platoon NCO who has come out of his bunker to scout the conditions (seen above the fore-mentioned bunker).
An overview of the battlefield at the end of Turn 3/4, and the Viet Minh have reached the trenches at B1, 2 and 3!:
Having suffered tremendous casualties passing through French artillery fire, the Viet Minh succeed only in one Pin at B1...
Over at B2, the Viets are more successful. A lucky shot into a key bunker (manned by a company MMG) causes a KIA on one of the crew and a Pin on the other! One Viet jumps into the enemy trench while the 2nd and 3rd coompanies begin to pass through the wire...
But the greatest success for the VM is at B3. Some of the Viets secure a destroyed bunker (note the retiring VM sapper to its left) and continue further into the trench (bottom right). The 2nd company can't come up too fast however, as they Viets have suffered heavy casualties here as well...

At the very end of Turn 5, a French counterattack is launched from B4 (right side). The Turn comes to an unexpected quick end as the "Coffee Break" Card is pulled. Each turn sees the players pull a card to activate a unit. There are also five special cards attached each turn, including 4 drawn from each players special deck containing: 1) Charismatic Leader that permits every unit on that side to gain a free activation; very handy indeed! 2) Company Captain which provides a player to activate any/all units w/n a company; 3) Company Lt provides 2 Platoon activations; 4) Lt/NCO allows ten figures from any platoon to activate; and 5) MG allowing the activation of one MG. Each turn the players select two cards randomly to place w/n the cards used for the Turn making it a surprise each turn. The "Coffee Break" is always shuffled into the deck and therefore it appears randomly, sometimes early, sometimes later. You never know, an added fog of war...

Turn 6 sees the VM 2nd Co at B1, struggling to make it to the trenches. French artillery fire has been called down just outside the wire (note the green marker). Three such soldiers however have made it into the trenches (center photo). French reserves are arriving from the left...
At B2, murderous point blank fire is raking the trenches at top, while below, the VM have wiped out the MMG crew and cleared the bunker...
At B3, the Viets have just about cleared the first line of trenches/bunkers, with one lone legionaire remaining. The Counterattack is moving up to the command bunker in the center...
To be continued...


No comments:
Post a Comment