Tuesday, August 20, 2019

Gettysburg: Day One. the Final Moves

View from the SW with Gettysburg in upper right and Seminary, top center
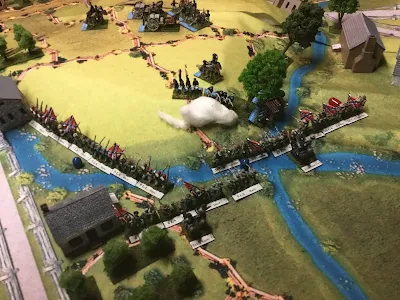
On the Yankee right, Devin is passing the Culp's farm. The models of this farm are from Buildings in Conflict again) You probably notice the change in the mat. On the right is Cigar Box. Needing to expand southward (always wanting more) I purchased some fabric at Hobby Lobby (original color seen in lower right), and have hand-painted another 4'x12' section. The professional is nicer of course, but I'm very pleased with my creation
Troops (some routed...regiment in lower right with a red cap for example), pouring into Gettysburg. Some I Corps troops seen in upper left. The bottom half portion of the mat here is my own.
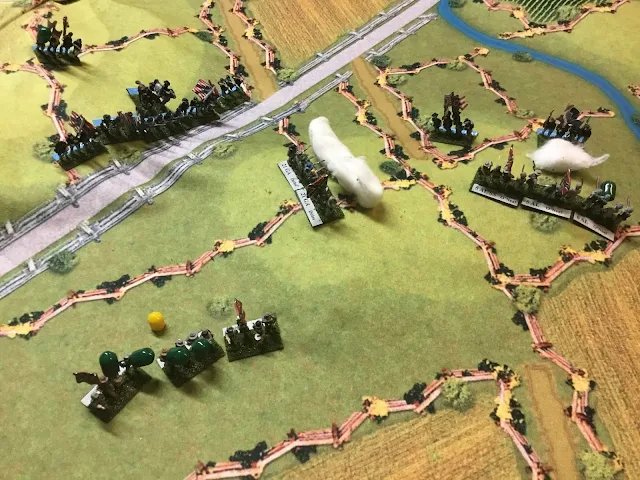
One of Kyznowski's regiments (top left center) rolls snake eyes on a morale check (instant rout in the rules), leaving his defensive line a tad shaky. Ironically, his men routed one of the Rebs' units who rolled the exact same result! General Avery's Brigade is outflanking the Federals anyway on their right (right center)
As the XI Corps has collapsed on the right, I Corps is pressing into Gettysburg as well. This one turn illustrated quite well the difficulties the Union experienced at this point in the battle with so many crowding the streets in their attempt to reach Cemetery Hill
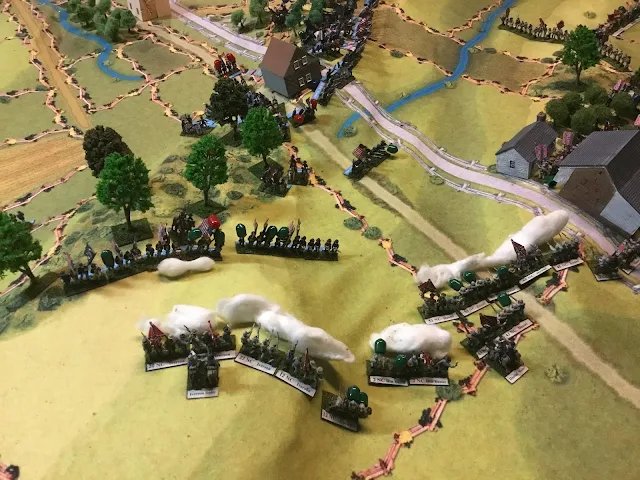
The Confederates reorganize and push into Shieds Woods at the southern end of Oak Ridge. The 58th NC (top right) has successfully charges and force the Yankee artillery and a small regiment to retire near the Thompson House (This would be used by General Lee as his HQ for the rest of the battle)
The struggle intensifies at the Seminary as both sides lose a full stand in the exchange (left side of photo, note the gaps in both lines)
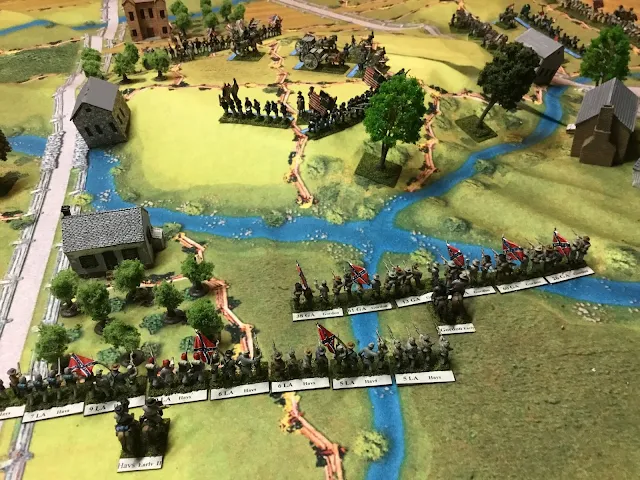
And Gambles troopers take position at the west edge of McMillan's Orchard. You can clearly see the Cigar Box mat on the left, and my own on the right
The game ended at this point with the Confederates about to enter Gettysburg from the north, and the Yanks preparing to abandon Seminary Ridge. The rules Across a Deadly Field were for the most part, effective. A few changes I think I will work on with only the overly complicated Charge Rule I believe I will throw out or heavily modify. Im hoping to try out this game with the club members in the near future and then again in BCon this September, so well see. Thanks for visiting.

Sunday, August 18, 2019

Blood and Plunder: Privateers against a Treasure Galleon

Ever since Firelock Games introduced Blood and Plunder several years ago and I bought in totally to their second Kickstarter, I wanted to try out my massive Galleon produced by Old Glory. Because of its immense firepower (25 gun broadside!), we decided to run three Privateer vessels against her. A French Sloop (6-guns) commanded by the infamous Francois L'Olonnais; an English Brigantine (8-guns) lead by Henry Morgan; and a Dutch Flyut (14-gun) captained by Diego the Mulato, would try to bring the Spanish low. The mats are produced by Cigar Box which I highly recommend. The figures are mostly from Firelock with a handful from various other manufacturers.
The wind is coming from the south (right photo) with the Galleon anchored under the guns of a Spanish fort (seen in next photo). The French Sloop is seen approaching at bottom right, while Morgan's Brigantine is advancing (seen at top right). Diego's ship hasn't made it's appearance yet.
The view from above the Spanish Fort (housing a 64pounder (!), two 12pounders, with the Galleon at top. Morgan at top left and L'Olonnais top right
As the French Sloop moves to rake the Galleon's stern (it was hoped for anyway), it came under fire from two guns in the Spanish fort. While the smaller gun missed, the massive 64lb made an incredible die roll (needed a 10 on 10x!) and put some hurt on the French although amazingly, no casualties. The Spanish commander (Juan Corso) has raised his anchor and put on minor sails to begin inching forward. The Dutch Fluyt as arrived as well, hoping to occupy the enemy's attention thus allowing his cohorts to rake both bow and stern.
Disaster for the Privateers! The wind changes and now comes from the east (right photo). Good for Morgan (upper right), but both the Sloop and Fluyt are in trouble. L'Olonnais was just getting ready to fire on the stern and now is pushed into the surf. No real worry about grounding he thought, only a roll of 10 will affect the low draft vessel. The French roll a 10! Paying a doubloon (like a get out of jail card in the rules), the French get a second roll...and another 10!! Finally, spending yet another doubloon, the Sloop doesn't ground. But now she is out of the fight. Morgan is forced to lower sails to reduce speed so he can attempt to turn inside the Galleon and stay on her bow. But that port side broadside is getting prepared to lower destruction on the English. Diego is facing a very difficult decision. Does he turn with the wind (to port) and into the Spanish broadside, or to the starboard and try to tack.
While the French Sloop has lowered his sails and is using his sweeps (2" a turn) to bring itself back into the fight, and the Fluyt struggles against the wind, a collision occurs which does heavy damage to Morgan's Brigantine. A number of Spanish guns pound away as well, and the English are in serious danger!
Morgan is gone! Spanish guns pulverize the unlucky English, sending her to the bottom. While the Sloop continues its sweeps, the Fluty is now in an unenviable position. Her only hope (and a bad one at that) is to maneuver down the starboard side of the Spanish Galleon and take her chances she can survive the guns. She is already taking a pounding from the forward guns of the Galleon. But it doesn't turn out that way. The two ship's rigging become fouled and the Fluyt cannot escape. She too is sunk beneath the waves!
L'Olonnais would have been better off simply turning with the wind and fleeing the battle, but he had loyally stayed with his allies and eventually brought his ship around. Unfortunately in the time it took, Corso brought his Galleon down onto the poor Sloop! The collision and bow chasers brought down both masts of the French vessel. The one advantage the French had was that they were on the Spanish bow and dealing serious damage down the length of the enemy ship, including starting a fire!
The only hope the French have is that they remain entangled so they can continue to blast their cannons into the defenseless bow. But it wasn't to be as the Galleon cuts away the wreckage and when she moves slightly forward again, the damage done to the Sloop is too much and she goes down as well. Great day for the Spanish!
The game was enjoyed by all (especially the Spanish player as he had not won a game in B&P yet!) That huge Galleon is quite the powerhouse


Friday, August 16, 2019

Gettysburg: Day One. Part IV

Been trying out the rules Across a Deadly Field for several weeks now and so have to clear the table. To do so as quickly as possible, Im going to do photos for each two turns.
Gordon begins his final push on Blocher's Knoll with General Hays flanking the Federals to the east
Doles' Brigade pulled two of his regiments back as General Ames of the Union XI Corps brought more firepower than he could muster. O'Neal is driving off von Steinwehr's skirmishers
Meanwhile in the center, Generals Daniel and Thomas are finally clearing McPherson Ridge
As the Iron Brigade withdraws from the Orchard and the Woods, the Confederates drive on
General Barlow is forced to move his Brigade back with Hays' troops threatening his right flank and Gordon pushing against his center
With General Ames about to pour a punishing fire into the flank of his Georgians, General Doles orders their retirement. Two of O'Neal's regiments successfully charge some Union skirmishers, destroying them (center right)
With the exception of the Yankee right flank regiments, (left-center) the remainder are withdrawing in some disorder. Generals Iverson and Daniel look to clear Oak Ridge
Rebel fire destroys two weakened stands of the Iron Brigade (leaving on two men standing-left center). General Pender's division is sweeping up against their left flank. 
Overall all view from the SW. McPherson farm upper left, Seminary tope center and Gettysburg slightly to the right and above Seminary
Now coming on 4PM, Avery's Brigade of Early's Division appears in the NE as Hays and Gordon take Blocher's Knoll. General von Gilsen and not Barlow, died on the Knoll this time
General Ames about turns to face the Rebels coming over the crest of the Knoll and try to give the rest of Barlow's Division (see retreating at center and right of center). But there is another problem...
General Doles has come on again with his Brigade (upper edge of photo) and with one volley, convinces Ames to skedaddle! (top center). General Kyznowski's Brigade can be seen (top left center) moving his Brigade to attempt to stem the tide
Meanwhile, on Oak Ridge, General Ramseur and his men arrive
At the southern edge of the Ridge, Generals Iverson and Daniel continue to push the Yankees...
and by the end of both rounds, most of the Federals have retreated from the ridge.
General Pender's Division has taken complete control of McPherson Ridge but Federal troops are digging in on Seminary Ridge (top edge)
General Buford has Calef's Battery open fire on the Rebel right flank, while some Confederate troops redeploy prior to their assault on the Seminary
Part of Ames' Brigade routs and the General himself is killed. The rest of the Brigade rapidly retires into Gettysburg (upper left). Kyznowski attempts to hold back the charging Rebs (upper right)
von Steinwher too, pulls his skirmishers together, hoping to stem the tide
The Confederates can lay claim to all of Oak Ridge, as the last I Corps troops withdraw (top center)
Thomas, Scales and Perrin exchange volley with the Federals on Seminary Ridge who are stubbornly holding on so the rest of the Corps (top center) can escape through the town to the rally point on Cemetery Hill (out of the  photo, to the upper right)
At the extreme right of the Confederates, Pettigrew's reformed Brigade is watching Buford move Gambles' troopers around McMillan's Orchard (upper right)


Saturday, August 3, 2019

Gettysburg: Day One, Part III

With the arrival of the Federal XI and Confederate II Corps, the battle reaches it's peak:
Gordon (bottom right) and Hays (bottom left) of Early's Division now appear at the NE corner of the battlefield with Barlow's Division seen at upper left of photo

Doles Brigade (lower left) and O'Neal (right center) drive off Union cavalry
The very confused fight on Oak Ridge sees Iverson"s men driving against the Federals of Paul's Brigade (top left), while part of Daniel's along with Davis, are hammering Baxter and Cutler. The Federals of Cutler take an exceptional pounding, not only losing a stand of men but Cutler himself! (upper right)
Pettigrew's men move closer to Herbst Woods, but save their ammo.
Generals Heth and Thomas (lower left) and Petttigrew (upper right) rally four different regiments that were either routed or Shaken!
 Beginning the Union phase, General Barlow has his Division moving on top of Blocher's Knoll, as General Dole and his men appear in lower right. Gordon and Hays are off picture lower left
Devin's Cavalry mount up and ride away as General Steinwher's Brigade takes up a skirmish line linking I Corps with XI Corps (Barlow is off to left of photo
Again, a very confused struggle on Oak Ridge. One Federal regiment chose to retire quickly (seen at upper right just beyond an artillery battery). But Davis' 2 Miss is taking heavy casualties (center right), while its 42nd Miss lower right) becomes Shaken.
Beginning once again, on the Confederate left, Gordon and Hays move closer to Blocher's Knoll with Barlow's Division seen at upper edge of photo
Doles' Brigade is also moving towards the Knoll while Federal Cavalry is falling back
On Oak Ridge, O'Neal (left of center) and Iverson (center) smash up another Federal Regiment (gap in line just about center of photo)
While under artillery fire, Davis' 2nd Miss risks a lot while trying to break what is left of Cutler's line north of RR Cut (top right)
Pettigrew's men go all out and move on Federal's Iron Brigade in Herbst Woods
von Gilsen of Barlow's Division make it to the top of Blocher's Knoll as Gordon's men approach from photo's bottom
Devin's Brigade continues to pull out of the line as elements of XI Corps approach
Even though it is the Federal Phase, The Confederate Reaction under the rules blows a large whole in Paul and Baxter's line (center)
Davis's 2nd Miss is finally forced to fall back as its position becomes untenable (Two artillery batteries lining them up!)
Casualties are taken by both sides along Herbst Woods. 24th Mich (center) and 52nd NC right of center) both lose a stand
Gordon pulls his Brigade up near the foot of Blocher's Knoll
Doles' Brigade is moving on the westward side of the same Knoll, while General Ames of XI is moving up behind Barlow (upper center)
Daniel's 43rd NC breaks up Baxter's Brigade while O'Neal and Iverson ground away against Paul
All does not go well as Davis has two regiments who fail to rally and continue to the rear!
Pettigrew and the Iron Brigade exchange more casualties and neither side will blink!
Gordon's Brigade actually gains first blood during its Reaction Phase
Wilkeson's Artillery Battery on the Knoll, creates two casualties on the 4th GA with its first barrage!
Paul's Brigade finds itself in a precarious position with Johnny Reb on two sides and casualties mount
Baxter recovers his brigade (top left) while Federal fire in the center is totally ineffectual...
Both Iron Brigade and Pettigrew lose another stand but still refuse to give in.
On Johnny Reb's left flank, Gordon's Brigade gets another casualty on Barlow's men
But trying to give Gordon support is costing Doles' 4th Ga as another man goes down. General Ames of Schurz Division is approaching as well
Skirmishing has been unproductive so far (One of my biggest problems with this rule set right now. Virtually impossible to get any result unless you go to point blank range. I find that a bit unrealistic and will probably make changes)
O'Neal on the left and Iverson in center are pressing their advantage against the Yankees on Oak Ridge
Joining the fight at McPherson's Farm and Herbst Woods, Generals Scales and Perrin of Pender's Division add their weight against the Iron Brigade
Even further on the Confederate right flank, General Lane of Pender's Division has reached the Run while reformed, Pettigrew is in support. Time is running out for the Iron Brigade it would appear
Additional Confederate artillery is moving onto Oak Ridge as it is a fine position to fire on either I Corps or its sister, the XI
Barlow moves an additional regiment to the firing line, but gains no advantage
That Federal Battery blasts a hole in the 4 Ga line, and now Ames is up in support
Casualties are exchanged in the fight on Oak Ridge
General Paul reforms his line but he takes more casualties
On McPherson's Farm. the 38th NC loses men to the Federal artillery, but the Iron Brigade loses a stand in the orchard
to be continued...