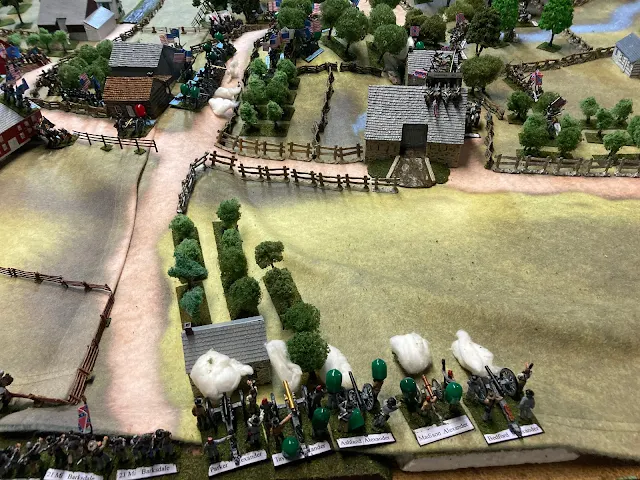
The fighting at the Round Tops (left) and Houck's Ridge, has died down. Law's men (bottom) rally but stay in position as they have lost 50%! The 4 and 5 Texas Regiments take position to hold Devil's Den (left center). A parting volley is made (and missed) by some Confederates at the retreating Federal section of artillery (top left center)...
Ward's Brigade (minus Ward) is retiring from the field (top left). Johnny Reb maintains his increasing success in Rose's Woods as their latest volley drop two out of Tilton's Brigade...
General Semmes moves part of his Brigade into Rose Farm. while the rest of his men swing into support...
Artillery from both the Yanks at the Peach Orchard (top left) and the Rebs along Warfield Ridge (bottom) pound away at each other inflicting casualties...
While Robertson and Benning regrouped their men, de Trobriand (left edge) is marching down the Wheatfield Road, and Weed's men (center) form on the north edge of Little Round Top, to match them...
de Trobriand's (top center) men regrouping near the Wheatfield while Ward's Brigade (right edge) leaves the fight...
In Rose's Woods, Tilton's men lose their exchange of fire, losing two more and becoming Disorganized...
Despite losing casualties to the Rebel artillery, Union guns pound the emerging Rebs at Rose Farm, dropping two and forcing the rest back Shaken! (right edge)
In the artillery exchange, the Reb's Ashland Battery (armed with 20lb Parrotts), is forced to retired Shaken. The Federals lose one battery that withdraws as it has lost 50 % of its men...
Answering the call for Federal assistance, General Hancock, II Corps, orders Caldwell's Division to move to the Wheatfield. (top center) Peach Orchard to upper right...
The Rebs of Benning, Robertson and Law regroup to await the seemingly upcoming attack from the Yanks of de Trobriand near the Wheatfield Road...
In Rose's Woods, the Rebs shoot up Switzer's men, making them Shaken as well. Thats two brigades these men are driven off! Unfortunately, as Semmes new line (bottom) comes out of the Rose Farm, they lose men to Union artillery in the Peach Orchard, and become Shaken themselves...
Wofford's Brigade now steps off towards Rose's Farm...
Lastly, Longstreet's final Brigade, Barksdale's Mississippians, step off towards their rendezvous with the Peach Orchard (top center)...
No sooner does de Trobrian's d reformed Brigade start forward, when they suffer an effective Reaction volley from the Rebs, breaking them and leaving them Shaken. It appears, that they have had enough. Note that at top right corner you can just make out Caldwell's Division...
Just as Barksdale's assault begins, much of the Federal Artillery massed in the Peach Orchard have been chased away. Making matters worse is that both Tilton's and Switzer's Brigade are either Disorganized or Shaken!
Wofford's Brigade (bottom left edge) and Barksdale's, ( top left edge) continue their advance...
The pressing need for Caldwell's Division is now clearly seen by the Yanks as they approach the Trostle Lane (top right)...
Benning and Law pull some of their men back into cover as they have come under artillery fire from Little Round Top...
Anderson's Brigade is smashing what's left of Tilton and Seitzer's Brigades (center and left of center)...
South of the Rose Farm, Kershaw has recovered his Shaken Brigade, but Semmes' men continue their retreat...
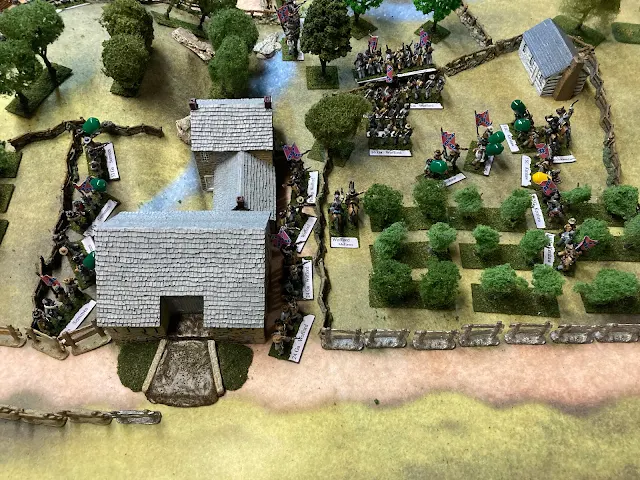
Barksdale's Confederates, fire a devastating volley into the Yanks attempting to hold the Emmittisburg/Wheatfield Crossroads, dropping three at the Sherfy Farm! (left of center)
With Federal Batteries in retreat, Caldwell's Division continues it's advance towards the fighting to the south (right)...
Even as they put themselves into cover, they still suffer another casualty...(left of center)
Anderson's men charge and capture a Federal Battery left unsupported by de Trobriand's retreating Brigade. They did limber the guns but could not get away!
Moving through the woods of Stoney Hill, Anderson's men causing havoc in the retreating Federal's ranks...
Meanwhile Kershaw moves his men forward once again, as Semmes continues to retire...
Barksdale's Brigade successfully charges the Yanks at the Sherfy Farm. They do lose a casualty to Reaction Fire from their left flank...
Finally, Wilcox's Brigade of Anderson's Division from A.P.Hill's III Corp, step off following Barksdale (out of photo to right)...
For the Federals, the Wheatfield, and Stoney Hill have been lost (right edge) as reserves (Caldwell's Division, Carr's Brigade-on road and top center and left center)) move up. Note the mass of retreating Yanks which illustrates quite well, the confusion that must have reigned at this point during the actual battle...
Barksdale's Brigade takes two additional casualties as they drive off Federals belonging to Graham from the Wentz Farm (center right)...
As Carr's Brigade forms up on the Wheatfield Road, The Rebs miss an opportunity when their Reaction volley is ineffective (center). Reba from Anderson's Brigade push to the northern edge of the Stoney Hill (lower center) The Remainder of Caldwell's Division is also moving up (left)...
Confederates from both Semmes and Wofford's Brigade are moving through the Rose Farm...
While the 21 Miss of Barkdale's Brigade moves through the Wentz Farm, and the left-hand regiments reform on the left, Yankee Regiments (left center) swing their left back to meet the rising danger...
As the grey line of Wilcox's Brigade takes ineffective artillery fire, the small Florida Brigade of Perry (left center), joins the attack...
to be continued...


