Friday, May 15, 2015

Jaobite Rebellions 1689-1745

Having just returned from from a sojurn to Scotland, I thought I woud do something a little different. The following photos depict 8 engagements fought between the English forces and the Jacobites rallying to place a Stuart back on the throne. Sadly most of these sites are not well marked; Falkirk in fact has no signage to help the searcher locate the site!
To begin our tour, we see the Cairn raised for the officers killed at Killicrankie in July 27, 1689. The Jacobites were lead by Viscount "Bonnie" Dundee, while William's forces were commanded by Major General Mackay. A farmer living on this very ground, has kindly allowed a small fenced walkway (very muddy in spots I will say) to cross the battlefield approximately right down the middle (along with a major highway I might add!).
While Mackay placed his army in a rather difficult position (downhill from the Highlanders, with a river to his back and a small pass as his lines-of-communication) Dundee placed his men in an excellent spot to charge down at his enemies, utilizing the Highlander's chief tactic: a ferocious charge to reach melee. He even had his army wait patiently for the sun (which was in his men's eyes initially) to set so they could see their enemies!. They charged from right to left in this photo. The Cairn is in the right background. Mackay's men were slaughtered in about 20 minutes. Out of an initial 5000 or so men, Mackay reached Stirling with only 500. 2000 may have died on the field, while another 500 perished in the rout. 2000 simply vanished! Jacobite losses amounted to at least 700 who fell at the first volley of the government troops. Tragically for the Jacobites however, "Bonnie" Dundee was mortally wounded at the final volley Mackay's troops managed.
Following their victory at Killiecrankie, the new Jacobite commander was much more cautious, taking until August to push out of the Highlands towards Perth in the South. Somewhere between 500-1000 soldiers were commanded by Colonel Cleland representing the government. The Jacobites had several thousand men led by Colonel Cannon, leader of the small Irish Regiment sent from France. At Dunkeld (only a few miles down the pass from Killiecrankie), the small band of government troops successfully held off attack after attack on August 21. The Highland Army retreated back into the mountains and went home. The Rebellion was all but over! The photo above shows the village square which the small body commanded by Cleland, barricaded for their seemingly hopeless stand!
The next attempt to restore James to the English throne occurred in 1715. This is not the place to attempt to describe the muddled attempts at organizing this revolt. Suffice it to say another Highland army was raised, led this time by the Earl of Mar, "Bobbing Mar". The government forces were led by a Scottish Duke, he of Argyll, head of the largest branch of Clan Campbell. The fight was on a desolate moor called Sheriffmuir, Nov 13, 1715. The Cairn above remembers that day
This view is towards the south and the forces of Argyll. There were no trees in 1715, so the appearance of the foreground would have stretched into the distance towards Stirling in the south. The battle was a strange one, with both sides defeating their enemies right wing, wheel and face each other at right angles to their original positions. But Mar (not a very good leader I might add) was a beaten man, and retreated, ending this uprising.
The next chapter is unique in that it involved a small force of Spanish troops landed in the Highlands to aid in the 1719 uprising. Again, there is much more to the story then I want to speak on here. What you see above, the Glenshiel, a few miles east of the Isle of Skye and the coast. The Marquis de Tullibardine (an exiled Scotsman) led some 1200-1600 Highlanders, even though he personally believes the men should go home and he with the Spanish return to the Continent. The Government forces  numbered some 1286 men lead by General Wightman. His forces advanced down the Glen from the background towards a very strong Jacobite position. Lord Murray had  detached a few hundred men to the summit on the right foreground, while the remainder of the Highlanders (inc Rob Roy and his MacGregors) stationed themselves on the slopes to the left. The Spanish were positioned in the center, from which this photo was taken. But Wightman had small coehorn mortars to blast away at the Jacobites, and while they were entrenched, could not respond. First Murray's men were driven off, then the Highlander's on the left. The Spanish troops maintained their position and then retreated up the hill that now bears their name: Sgurr nan Spainteach, Peak of the Spanish, where they surrendered the next day. Revolt over.
This is the view of the government troops towards the Spanish position marked by the stones on the crest. Standing there I could not imagine, trying to attack up that slope!
And now to the final chapter of these sad tales; the '45. In 1745, the Old Pretender, James III sent his son, Charles Edward Stuart to raise the country against the Hannover King George. Successfully landing on the western coast of Scotland with only seven men, the young Prince (age 25) convinced some of the Highland Chiefs to call out their men. They quickly captured Edinburgh, then advanced against a government force led by General Cope at Prestonpans, a few miles east of the Scot capital.
The Cairn remembers that engagement. At least there was a sign nearby aiding me in locating this site.
The view is from a large mound just south of the main portion of the battlefield. On Sept 21, The troops of Cope, numbering some 2400, were located to the left center, separated from the Jacobites by a marsh (where the trees now stand). The Scots, commanded by Lord George Murray, with about 2500 Clansmen,  marched through the marsh that night and took position on the right. At dawn they charged, and to make a short story even shorter, they broke the government troops in minutes! A grand start to the '45. That is the Firth of Forth in the background.
Having invaded England, and reaching Derby, some 100 miles short of London itself,  all but the "Bonnie Prince" advised retreat. They believed they were being surrounded by some 30,000 troops. With only 5000 at his disposal, Murray convinced the Prince to retreat to Scotland. At Falkirk Muir, on Jan 17, 1746, they met the forces of General Hawley. This Monument is the only marker to this battlefield. Most locals I talked to didn't even know it was here!
With a raging thunderstorm overhead, the Highlanders charged from right to left after stopping an initial Hannoverian cavalry charge. Totally breaking the left flank of Hawley's forces they took his cannons, but allowed his right flank, which was protected by a steep burn, to retreat from the field. The Scots continued it's retreat into the Highlands
In February, thanks in part to their captured artillery train, one Jacobite column, forced the surrender of the Ruthven Barracks. It probably helped the the English garrison numbered some dozen men!
The Jacobite Cause, which had tormented Scotland for decades, came to a bloody end here, on Drummossie Moor, some dozen miles east of Inverness. Ignoring Lord Murray's argument that this barren moor was not a place the fight the English cannon and cavalry, "Bonnie Prince Charlie" responded, "God is on Our side"! With some 4000 cold, wet and hungry clansmen against the Duke of Cumberland (the Prince's cousin, and son to King George) and his 7-8000 men with 12 cannon and additional coehorns, it was a slaughter, lasting perhaps an hour. The view above is towards the English lines (marked by red flags) from the center of the Jacobite army. Just as in 1746, this late April day had grey clouds threatening rain, and there was a chill wind blowing in from the east into our faces (as well as the Jacobites) 
This trip to Culloden I was able to journey to the southern edge of the moor to look up the burn that led to the right rear of Charlie's army. This is where Cumberland's Campbell soldiers tore down the stone wall so his cavalry could assault the rear of the Jacobite army. The steep slope and desperate defense by his reserves, saved his army from being surrounded.

And what better way to end the tragic story then by viewing the spot where legend has it that the Chief of the MacGillivray Clan, red-haired Alexander of Dunmaglass, after fighting his way through the English lines and half blinded, he crawled to some water, to die face down in that water.

So there you have it, a grand tour of Scottish battlefields. It was immensely satisfying locating each of these sites, especially the more remote and 'lost'. A sad story for a beautiful land and people. If you would like to read further, I highly recommend John Peebles Culloden, still arguably the best on the battle of Culloden. Picked up in Scotland on this recent trip, the book Raise the Clans by Martin Hackett which was fun and useful during my search. It is The Wargamer's Guide to Jacobite Britain and it covers all that I described and more.  Hope you enjoyed, and as my forefathers said: "S'rioghal mo dhream"

Tuesday, April 14, 2015

Battle of Houx, May 1940

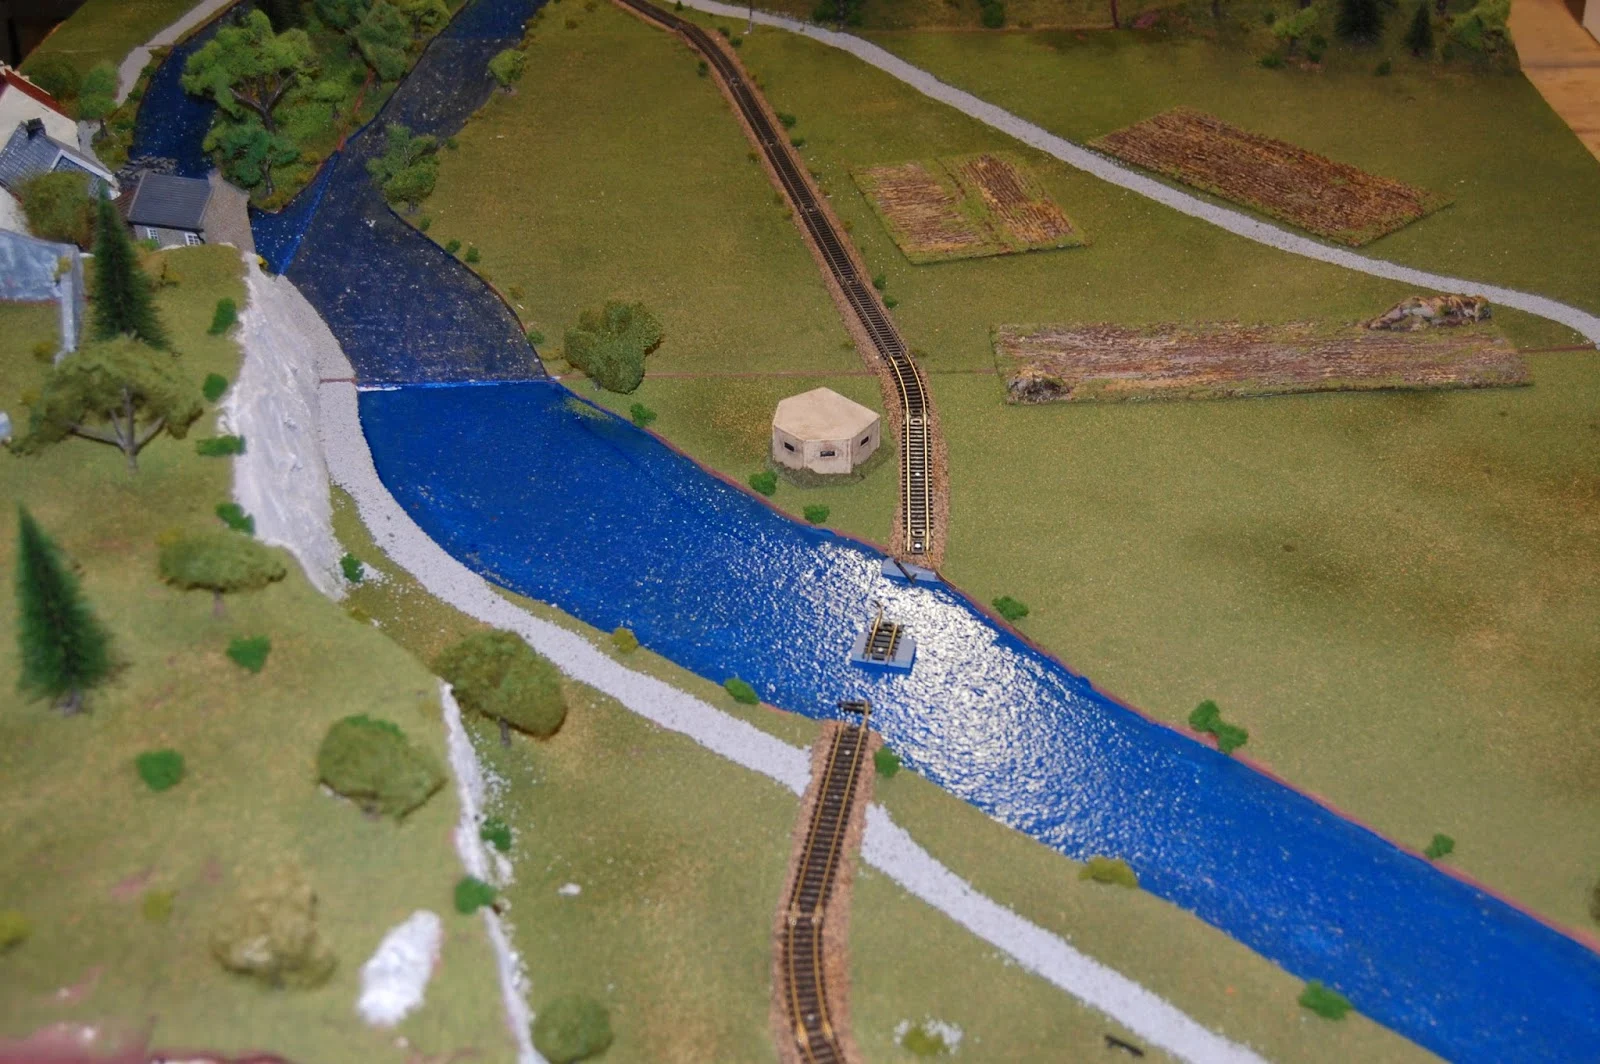
Added an additional tile to the fight as seen below, with Houx at top right:
Close up of the blown RR bridge with the defending bunker at center:
Historically, one mototorcyle company crossed the Meuse (I've scaled down to one platoon):
German 81mm Mortar and 37 mm ATG on overwatch, near the ruins of the Poilvache: 
A 75mm Infantry gun positioned in Houx itself ready to support:
Positioned on the heights overlooking the Meuse, is one platoon (scaled from Company) of the II/39/5eDIM. Two other platoons are stationed off board to the west as the French didn't place their troops near the river but instead took the high ground located to the west! Hevey MG team and artillery FO are seen at center. But the morning began with fog and the French didn't see the Germans below!
The fog enables the Germans to get a free move and they bring 1 Squad/2 Platoon over to the west bank while 3/1 moves on bunker manned by a MMG team of Belgian Chassurs Ardennais:
 TURN 2:
The Belgians finally see the advancing Germans and let loose but only score a Shaken (can't move/shoot next turn marked by Yellow Cap) and two Pins (can't move marked by Red Pin)
The French FO gets through to his 75mm Artillery battery, but the first shots strike off tarket near or on the Ile de Houx. French rifles and lmg however cause the first casualties on the German 1/1 at base of hill. Four KIA and one Shaken. German 81mm Mortar and MMG both miss!
Second French squad located on left side of heights is less successfull, scoring only a Shaken and a Pin:
First round to the French
TURN 3:
Germans win initiative again! They make it to the bunker but can't force open the door. Fire against the embrasures is ineffective. 

French FO loses contact! But their MMG gains one KIA and Pins another on the Lock...not a good place to freeze! German 1/1 moves up hill and gains one KIA and one Shaken. French MC races back to Platoon HQ which contacts CO HQ. They will send reinforcements...but it takes a turn to pass along orders! French fire from the heights gets four KIA (inc LMG team and the Pinned soldier on the Lock) and an additional Shaken. German 81mm Mortar lands on target and inflicts one KIA and one Shaken, but the MMG misses again. Finally the German lands a 75mm IG shell on target and puts one more KIA on the French:
Zoom in on the action at the top of the Meuse Heights:
TURN 4
French win initiative and the FO reestablishes contact, bring down a 75mm barrage on the troops crossing the Ile de Houx, gaining two KIAs. 

The German 1/2 brings the remainider across the Lock and continues to assault the hill, inflicting one KIA and a Shaken on the French MMG! French fire from the Heights gains another four KIAs and one Shaken. German return fire(inc 81mm and MMG) score big; inflicting a total of six KIAs, two Shaken and one Pin! They are gaining the ridge immediately above the Lock! 

Belgian MMG scores two KIAs while further German troops (2/2 and 3/3) move up to and over the Weir. Those French reinforcements better show up soon!
TURN 5
The Germans strike first as their 1/1 and 2/1 continue to assault the Heights, inflicting six KIA. The French FO team successfully mount their MC and escape to a safer position (center), while their troops strike back, getting three KIA and three Shaken. They also send a runner (center, left of mc) to HQ requesting assistance. 
Closeup of the carnage showing German 81mm placing a shell right among the French defenders KIA two and destroying the MMG (center). It's a hard climb up that slope! 
TURN 6
Fortunately for the French commander, they gain the initiative and continue the counterattack on the Heights. They will inflict four more KIA, leaving the German 1/1and1/2 with only a total of three men! The Germans in return add two more KIA to the French losses, leaving them in a very weak postiion as well. Whose reserves will arrive first?
French runner reaches the 3/1 (left of center)but the squad leader cannot authorize an attack w/o HQ so the runner must continue onto Platoon HQ (top of hill upper left)! The FO team redeploys (center) in preparation to bring artillery back online
Germans finally force open the bunker door and KIA two of the three Belgian Chassurs Ardennais inside...but one remains! Their defensive fire unfortuantely was ineffective!
TURN 7
French keep initiative and what's left of two squads on the Heights blast away, but only get a Shaken. German return fire (inc MMG) gets only one KIA and a Shaken. Both initial forces are spent. Notice the German 2/2 coming up the slope on left. The French FO fails to make communication with artillery...
while their 3/1 advance towards the Germans
On the German right flank, the brave Belgian Chassurs goes down under a barrage of fire!
TURN 8
Germans regain initiative and with what's left of the two squads on top bring down one KIA along with a Pin (lower right). The French 1/2 falls back to Pla HQ to regroup (in my rules, as long as the HQ remains intact, any/all casualties have a chance to recover. This reflects my inclusion of morale w/o having to make additional rolls and modifications. Each casualty rolls a 6d; 1-2 they were unhurt or very lightly wounded and may return, 3-4 and they are wounded and cannot return, while 5-6 results in KIA. Any recovering troops then roll once more to determine the number of turns in takes to recover, 1-3. It has worked well over the years). In this case, the French recover six riflemen and a LMG (from 11 casualties)...great job. Better yet, they will only take one turn to recover! The newly arriving German 2/2 troops on the left reach the crest and blast away at the French troops moving towards them. Three hits...but all on the same figure, the squad leader!(hidden behind tree just above French HT, left of center). The French then return a devastating fire and get five KIA! French reinforcements (2 Platoon) begin arriving near the 1 Pla HQ (above photo on right), while Germans occupy the base of the Heights with their 3/2.
Finally on the right, German 3/1 redeploys along RR embankment
TURN 9
French regain initiative and 3/1 and the last remaining member of 1/1 who had been pinned and counldn't retire, causes 2 KIA. But wait...everything the Germans throw at them misses! Unfortunately for the French, the remainder of the German 2/2 reach the crest (lower left) and inflict 4 KIA. 
The French FO gets the final hurt in as they land all three 75mm on target along the RR embankment and inflict 3 KIA. Good thing those men listened to their sergeant and kept their spacing!

Meanwhile the German 3 Pla begins crossing the Meuse, some by boat:

TURN 10
French win initiative again and what is left of 3/1 causes another KIA and a Shaken on their opponents.
Germans then drop seven KIA out of the Platoon, leaving one lone Frenchman standing! French 2/1 recovers four men for 2 turns while the Germans reorganize as well: 1/1 recovers 5 for one turn. 1/2 is not so fortunate, gathering only 3 for three turns.
The German 3 Platoon continues to deploy to the Ile de Houx or the Weir/Lock. They must hurry. as the French reinforcements are making their presence felt on the Heights!
TURN 11
Germans gain intiative and use it to inflict 5 KIA on the advancing French Dragoon Portes, but return fire drops 4 KIA, a Shaken and another 3 Pinned which leaves the survivors hanging on by their fingernails. The German 81mm puts down a perfect shot amongst four closely packed Dragoon Portes, KIA them all! (upper right)
Not to be outdone, The French FO maintains contact and brings 3 75mm shells down on the two recovering squads and gains 3 KIA!
The 3/2 French Dragoon arrives and takes postion in front of it's Platoon HQ, while German 1/3 and 3/3 cross the Meuse on boats
TURN 12
French regain initiative and use it on the Heights, gaining another 4 KIA and 1 Pin. Fortunately for the Germans, their Pla HQ has sent up the 60mm team (bottom center, who hit with all three shots...and receive 3 KIA!!) to reinforce the few remaining (4 on right of cernter) German returns fire and drops two more KIA plus 3 Shaken...they're not giving up w/o a fight! 
The French FO again brings down his 75s, this time on the RR embankment, and gets a KIA and a Pin. The Artillery has been devastating!
The German 3 Platoon is now arriving and grouping along the Meuse. With troops arriving piecemeal, they haven't been able to win the battle on the Heights...
The French place 3/2 (top center)and the recovered 1/1 (bottom center) in a secondary line just forward of their Pla HQ (left center). They do love their defensive battles!
There will be a delay in finishing this epic struggle...leaving for a trip to the Scottish Highlands tomorrow! ...so it will be continued...


Wednesday, April 8, 2015

Crossing of the Meuse 1930

A number of years ago I created a large detailed board depicting Rommel's crossing of the Meuse during May, 1940. The ground covered stretched between Dinant in the south and Houx in the north. The battlefield was used successfully at Tacticon (Denver Colorado gaming convention) and now I've decided to bring it out once again. With new research, figures etc, it promises to be exciting. So here are the first initial photos showing the terrain around the small Belgian town of Houx.
Flying above the future French lines and looking back eastward, you see Houx in the upper left with the Ile de Houx along the top edge. The base of the steep hills bordering the Meuse can be seen to the right
Looking down on Houx itself with the Ile de Houx to the left. A German Motorcycle Battalion will reach this ground during the night of May 12-13
Looking south over the Ile de Houx, you now see the most important feature in this sector: the Wier and Lock at the top of picture. French would be to the right
View of the said Wier and Lock, viewed from the east bank (German positions). It is during that fateful evening of May 12-13, that a lone company of German cyclists creep along the Wier to the Ile first, then to the west bank itself. The French are holding the heights of the hills seen in upper left and also located further to the west (top of photo) and will not impede the Germans! Rommel will have men across the river days before the French C-n-C General Gamelin, believes that the Germans can even reach the river!
Final preliminary photo show the Wier (right branch of Meuse) and Lock (left branch), with Houx at top right and French positions on the hills at left. The road and RR at top will enter the town of Anhee located off top of photo. Planning on recreating the fighting during the early hours of May 13 today, so hope to have some updates shortly. Viva la France!

Saturday, November 1, 2014

Second Coming of the "Taiping"

This was the entrance to the underground complex in Episode Eight: “Into the Lair”. It is a copy of a Buddhist Cliff Temple called Lianlongshan. It doubled for the HQ of one ‘mastermind/madman’ who believed that he was the reincarnated Yang Jiuquing of the Taiping movement of the 19th Century! The main entrance into the underground complex is in center. Secondary shrine on left:
As Blackpool’s ‘Company’ moved against the complex, the sentry was unaware of his pending doom:
Deep inside the mountain, ‘Yang’ (that's him in the 'bowl') addresses his followers, not realizing that events are about to burst upon them. As 'Yang' whips up his supporters, his mad scientist (got to have one of those, right?) henchman and 'messenger of death', attend to his words:
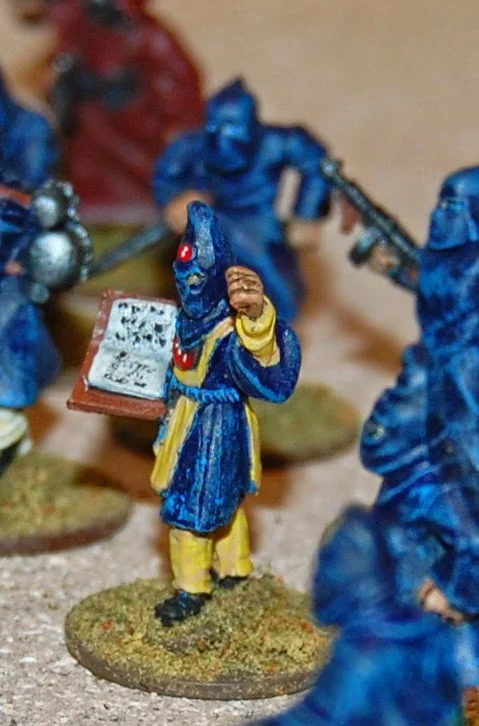
One of ‘Yang’s’ priest-generals gets into the moment.


A guard of one of the sect’s prisoners, takes a moment off, just before he is’ taken out’.
Outside his heavily protected laboratory, the scientist poses with one of his creations, the ‘Fire Dragons’. In the story, prisoners have a gas mask surgically attached to their face (ouch!) with a mind-controlling gas circulating within it. This provides the Taiping sect, control of soldiers who have no fear and do not even know immediately when they are dead. They gave "The Company" all sorts of problems in this Episode
Another of the “Fire-Dragons’ on the left, with an upper-level Taiping on the right, and a novitiate with the torch
During the Episode, "The Company" thought they destroyed the nest, but the leaders escaped, promising a return! I will get more photos this time. Next up: Fengdu, the "City of the Dead"!