
General Buford's 1st Cavalry Division moves through Gettysburg and up onto Seminary/McPherson Ridges


Experimenting with lighting, this view is looking NE across Herbst Woods with the McPherson Farm on left

The Supply Wagon bringing up the rear of the column as the Troopers begin deploying on McPherson Ridge at the upper left.

Overview of the NW edge of Gettysburg, with the Lutheran Seminary sitting on its ridge with the troopers on McPherson Ridge in upper left.
General Heths' division, Archer and Davis Brigades arrive at the NW edge around 0740 after pushing back Buford's vedettes stationed along the Chambersburg Pike. (upper left corner)

Archer's Brigade reaches the main defensive line in front of the McPherson Barn in upper center of photo

Pettigrew's (center and right) and Brockenbough"s (left center) brigades move off Herr Ridge) foreground) while Pegram's Artillery pound the US Cavalry at top of photo. Archer's Brigade is exchanging volley's with the US Troopers (top right). Note the fight in upper left, highlighted in the next photo.

Davis' 55th Mississippi Regiment has to deal with troopers appearing on their flank near the Bender Farm

Unknown to General Heth, The Federal I Corps led by General Reynolds makes its appearance using McPherson Ridge to the west to screen its approach.

Archer's Brigade is sliding to its right to escape the blistering fire of Lt Cushing's 2 sections of 3" Rifles stationed on the Chambersburg Pike (left of the Barn)

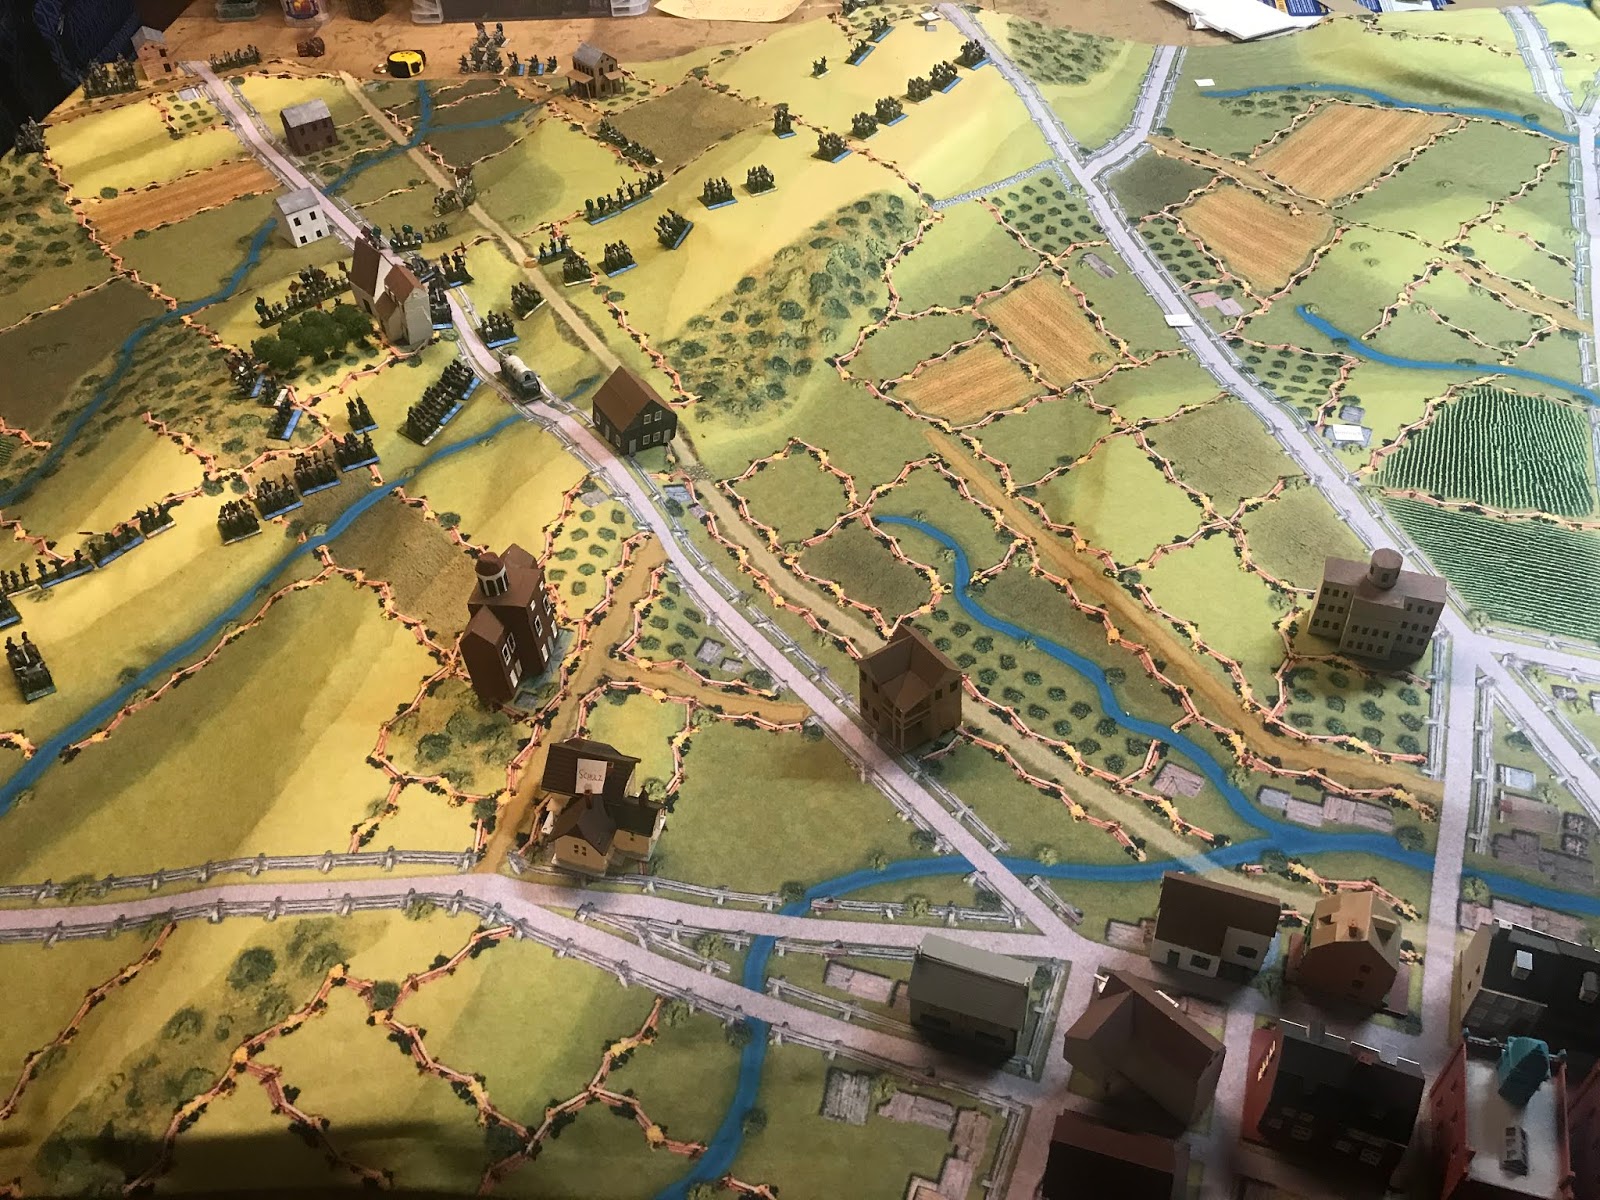
This photo I took to show off the Cigar Box mat, viewed from the east with Gettysburg in upper left. Each of the individual buildings (such as the Adams County Almshouse left of center) are models of actual farmhouses, either scratch built or from Buildings in Turmoil. (which I highly recommend! The Forney and McClellan Farms are seen in upper right of photo.

A view overlooking the Confederate Pegram's Artillery Battalion

Archer's Brigade totally engaged with the dismounted Troopers in the Herbst Woods

Davis' Brigade redeploying its regiments against the Federal's right flank

on the Confederate left flank on the western slopes of Oak Ridge with the Forney Farm at the top. Federal dismounted cavalry is causing the Davis Brigade problems by threatening its flanks

Over on their right flank some more Federal cavalry is causing another Rebel regiment to deal with their flanking position as well. Towards the left is Pettigrew's Brigade moving towards Willoughby Run at the foot of Herbst Woods where Archer's Brigade is mixing it up with more of Buford's troopers.

The Iron Brigade of I Corps is preparing to move into the fight from the east slope of McPherson Ridge

And further north on the Ridge, Cutler's Brigade of I Corps is moving into position behind the cavalry as well

Davis' Brigade on the left is having difficulties as one regiment had to reform behind the Bender Farm (center left, while a second found itself in shaken form after taking fire from the troopers along the fence (center) Brockenbough and his men are exchanging fire but neither side gaining an advantage here

Things begin to look up for General Heth and his Confederates on the right (only temporarily as it turns out) when two of Buford's regiments suddenly rout...the 8th Ill 9top right) and the 8th NY (top left). Its especially bad when Archer's men charge the unfortunate Union soldiers and capture numerous prisoners! Unfortunately...

The 24th Michigan and 2nd Wisconsin of the Iron Brigade then charge Archer's Brigade (center right) and virtually destroy one regiment and sending two more reeling back, routed (far left) while capturing General Archer as well! (Just as happened historically!)

And things go bad for the forces in Grey here on the left as well. Davis's Brigade rallies one regiment (far left) while seeing another retreat back (center left). Brockenbourgh begins to take casualties from canister from the newly arrived 2 Me battery of I Corps (just left of McPherson Barn) and from intense carbine fire from the 3rd Ind Cavalry Regiment (in front of barn)

The view of General Reynolds attached to the charging Iron Brigade (Which historically led to him being shot down and killed...not this time...yet)

Meanwhile, General O.O. Howard of XI Corps is passing by the Shield's House (Scratch built from photo taken on battlefield in 1863) on the Chambersburg Pike just west of Gettysburg

Davis' Brigade has finally coordinated its action on the left flank, and begins driving Buford's troopers up towards Forney Farm (upper left)

Davis also recovers its routed regiment (lower left) while Brockenbough (center right) does the same.

After a short lull, Pettigrew has his brigade consolidated and moving into the Habst Woods. Both his and the Iron Brigade make several morale rolls after heavy volleys.

Pettigrew's ace-in-the-hole however, the 52nd NC after routing the 8th Ill Cavalry, is moving towards the Iron Brigade's unprotected flank. Only the one section of Calef's battery which is still on McPherson Ridge is watching the approaching Rebels!
To be continued...
No comments:
Post a Comment