Friday, September 20, 2024

Chapter 12: The Taking of Gaviah II

 The Genestealer Cult on Ieaid continue to push for higher and higher goals. Having taken control of numerous outstations and mining establishments in the Waste Lands, the small settlement of Haviah II is selected as the next target.

Gaviah II from the East...

Gaviah II from the North...
Gaviah II from the South...
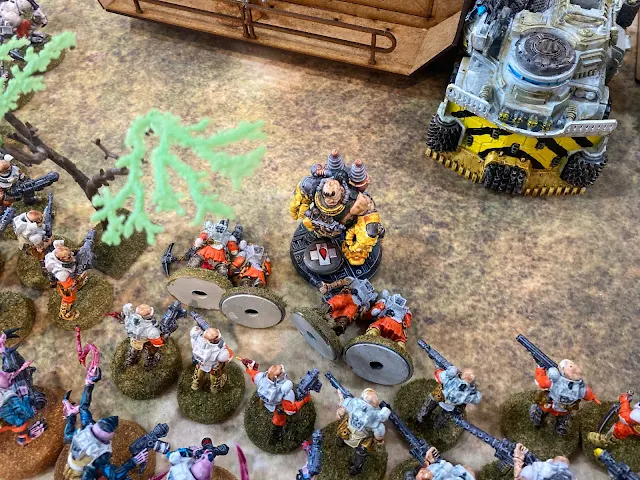
Using a captured Cargo 8 and Ridgerunner vehicles to drive into the center of the town, the initial target is the Arbite's Station (right center), and the local PDF Transmission Post (upper left center)...
An Arbite Sniper observes the vehicles, but no alarm is set...
The Sniper also notices figures advancing from the east out of the WasteLand, and that message is sent down to the Post Sergeant. He puts a call into the PDF post...
The Cargo 8 truck pulls up between the two posts, and the attack begins. From inside the cargo containers five Acolyte Hybrids and an Abominant step out and with supporting fire from the Heavy Stubbers on top of the Cargo 8, take down one of the Arbite Sanctioner Automata, while losing only one Hybrid...
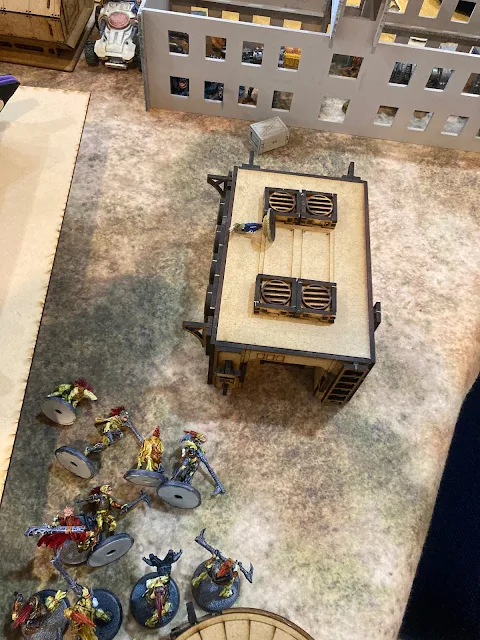
Now some Atalan Jackals along with a Jackal Alphus (left), enter Gaviah from the south...
PDF fire from atop their station, the Arbite Vanator, as well as an Orlock Quad, take down a number of the Hybrids...
At the southern edge of Gaviah, the Jackals and a Ridgerunner eliminate some Orlock members inside the Manufactorum, as well as an Arbite...
While the Cultists lose all but one of the Hybrids, the Abominant swiftly destroys the second Arbite Sanctioner. Inside the Tavern (left-Orlock Operations Center!), several Orlock members line the windows in an attempt to beat back the assault...
The PDF troopers on top of their post, along with the Arbite Venator, exchange fire with the Cargo 8...
Unfortunately for the Orlocks, the remaining Hybrid lets loose a blast from his handflammer into the Tavern, while the Abominant breaks through the door! Incredibly, two of the Orlocks survives this attack...
The guns on the Cargo 8 did some damage to the PDF forces on the tower...
The Cultists dropped an Arbite and the Orloc's second Quad...
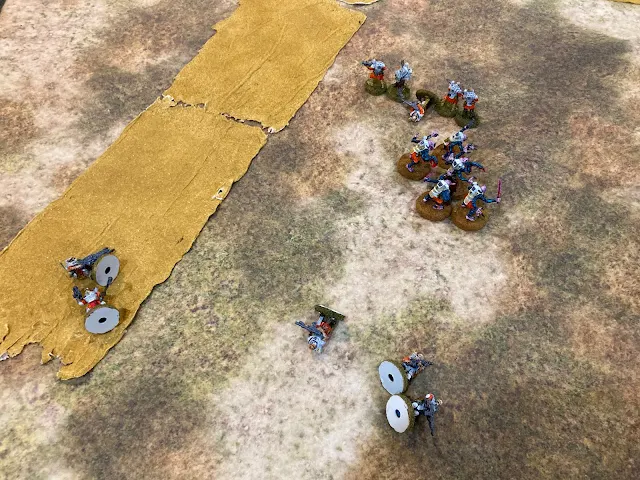
On the east side of Gaviah, Cultist Acolyte Hybrids and Neophyte Hybrids (can't see them all , but 30 Neophytes and 15 Acolytes are there!) devastate the Ironhead Prospectors and their Ogryn attempting to get to the truck to escape. (they were only in town to 'wet their whistles')...
The PDF and Orloc Quad score a success, knocking out the Cargo 8 (and with it, two Heavy Stubbers and a Grenade Launcher!)...
The Ironhead's Ogryn continues the success when it charges the Neophytes, and takes four of them down...
Things continue to look up for Gaviah's defenders, as some Orlocks and their Ridgerunner take down some of the Cultist Waste Land Nomad allies (Yes, they are actually Kroot miniatures)...
The Cultist Ridgerunner faces off against some Arbites, their Vanator, and an Orloc Quad...
The Abominant ends the Orloc resistance iinside the Tavern HQ. (the smallish figures you may notice throughout the town represent Loyalist and cultist townfolk fighting each other)...
A lone Ironhead stands firm while Aberrants finish off the Ogryn...
The Nomads drop one Orlock and a townsperson...
The PDF and the Arbite sniper bring down two Jackals including the Alphus...
Disaster for Gaviah! The Cultist Ridgerunner destroys the Orlocks's remaining Quad as well as their Ridgerunner...
As Acolytes close in, the Nomads score three hits on the remaining four Orlocks...
Things are continuing to go downhill for the defenders as the PDF forces loses another...
Hordes of Acolytes and Neophytes swarm towards the last strongpoint of the Orlocks at the southern edge of town...
More disaster; the PDF force is down to one, and the Arbite's Venator is destroyed as well...
The last hope for the defenders rests with Slate and his power dog Mecuda. They almost bring the Abbominant down, but with only one hit point left, it gets the initiative, and it eliminates both...
The last Orlock resisting is brought down by the Nomads. Gaviah II has fallen to the Genestealer Cultists!
Its on to the capitol Ieaid itself!


Tuesday, September 17, 2024

Chapter 10: The Orlock Mining Establishment

The Genestealer Cultists target a Mining Concern, run by the Orlock Gang, but initially they take heavy losses...

The Cultists do however, reach some of the Orloc men in melee...
More men of Orloc rise up from their mine, along with an Automata...
One of the Orloc Outrider Quads is brought down by the Cultists, while in the upper right you will see the powerful Cultist Aberrants...
Those Aberrants tear through ten Orloc warriors as if they were not there! In fact, the Orloc resistance is soon destroyed, and the Cultists move on...


Chapter 11: Ieaid's Fleet Attacks!

The Governor of Ieaid is concerned with the bad news arriving from the Strike Cruiser "The Crusader's Sword. Fleet Admiral Torvaz however is not. Even though he has not seen action in many years, he has faith in his System Flotilla. It consists of a Dominator-Class Cruiser, "Ironwrought"; a Tyrant-Class Cruiser, "Tear of Power"; a Dauntless-Class Cruiser, "Talon of Lethigo"; and a three-vessel Squadron of Cobra-Class Destroyers. Taking position on his flagship "Ironwrought", He leaves word that he will soon have the situation rectified.

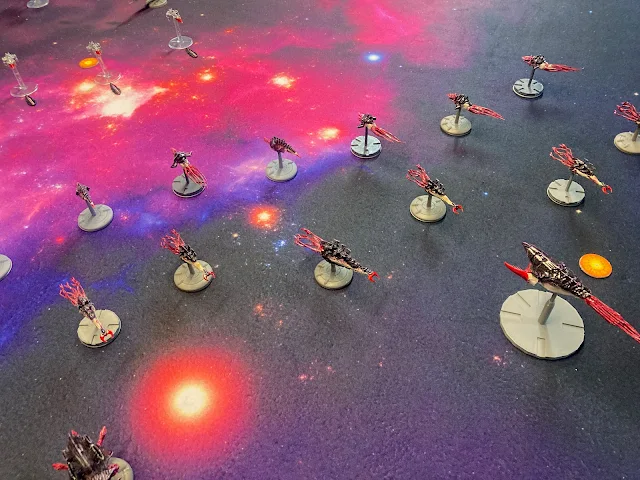
As Admiral Torvaz nears the oncoming invaders (from upper left), he has no trepidation despite the large number of Tyranid ships approaching (lower right)...

The Imperial Ships, from bottom counterclockwise: 1) "Ironwrought"; 2) "Tear of Power"; 3) 3x Cobra DD; and 4) "Talon of Lethigo"...
The oncoming Tyranid Fleet with the Hive Ship surrounded by its protective Drones at bottom right; led by 8x Kraken armed with BioPlasma or PryroAcid; followed by 6x Kraken with Feeding Tentacles; and three cruiser sized ships to left, above and right of the Hive Ship...
First shot to the Tyranids, but the Cobra's shield deflected the hit...
The "Ironwrought" brought its Nova Cannon to bear, but just missed a Cruiser (right). The Cobras, on their turn launched their torpedoes (upper left)...
As the Imperials turn to bring their guns to bear, a Pyro-Acid shell hits the "Talon of Lethigo", but the shield absorbs it. Meanwhile a hit is scored on a Kraken by the "Tear of Power" (just out of picture to left) and one torpedo strikes another...
Both Krakens disappear in twin blasts while, another torpedo strikes a Tyranid Cruiser. But the spore barrier saves it, but it still takes one hit...
A significant turn for the Tyranids as first, PyroAcid strikes a Cobra (it is destroyed), and then a Kraken reaches another Cobra, and proceeds to tear it apart with its feeding tentacles. Yet another Kraken, does a point of damage to the "Tear of Power". Ouch!...
The Hive Ship seems to be threatened by the third torpedo...
But the Hive Ship with its Drone escorts simply sails straight into the torpedoes and not one of the six makes contact! Terrible luck for the Imperials. But it gets worse. A Tyranid ship with Feeding Tentacles reaches the "Tear of Power" although it survives. The last Cobra is not so lucky as it and its crew are devoured! Shots taken at the "Talon of Lethigo" all miss...
The Talon now makes a bold move and smashes down onto a Kraken (center), splitting it into pieces!
Admiral Torvaz sees the way is to charge through the Tyranids, so orders his Flagship straight at the Hive Ship. His gunners on both the port and starboard sides unleash hell upon the Tyranids. on either side. The Razorback cruiser is hit but not penetrated, but the large cruiser on the other side explodes as numerous hits tear through its shielding spores and explode deep in its interior...
The Tear then fires its Nova Cannon at the Hive ship comes up a little short. Two of the Drones are vaporized however...
The Imperials get the initiative, and Torvaz and his Flagship fire again on the Hive Ship, but the only hit is absorbed by the Drones...
The Talon and Tear attempt to maneuver to support the Admiral as he charges the Hive Ship...
Both the Imperial cruisers go into overdrive in an attempt to gain space between themselves and the pursuing Tyranids, but to no avail and some damage is taken by the "Talon of Lethigo"...
The Admiral and "Ironwrought are trapped! The Flagship's latest broadside is as ineffective as the earlier one was devastating...
The massive Hive Ship with its gigantic claws begin to rip apart the "Ironwrought" while Kraken pout PyroAcid into her sides. 6x points of damage are incurred (out of 8) in just one turn!
Then, the Tyranids gain the initiative and the last words of Admiral Torvaz was"...how could this happen?" were heard as the grand old "Ironwrought" was ripped to pieces. The Tear and Talon now both attempt to make their escape. The"Tear of Power" succeeds, but the "Talon of Lethigo" can't quite escape the board. Instead it fires a broadside into the Tyranid cruiser bearing down on it and actually scores some damage...
Unfortunately for the Talon, it doesn't win the initiative...
The old Admiral learned an ancient truth...never underestimate an enemy!