Thursday, January 30, 2014

The Mahdi's Assault on Khartoum

Continuing the warm up to Genghis Con, we return to the film "Khartoum" and the climatic act.
The Egyptian/Sudanese of General Gordon must keep the Dervish Army out of the city to prevent a wholesale massacre! But they are outnumbered at least 5-1 if the numbers are to be believed. Let's commence the action:
The battlefield, first from the Mahdi's view, then from Khartoum:

Turn 1:
The two cannons on the city walls lash out with one round short but the other striking down 2 Dervishers. First blood to the Egyptians!
Turn 2: The Egyptian cannons both score hits this time downing 1 each, while rifle fire at medium range scores kills on 12 more!
Turns 3/4: The Mahdi's Army is taking some serious hits. Altogether 36 are lost even though the Egyptian cannons can no longer be brought to bare as the Dervishers get too close to the wall. Notice in the second photo how few of the initial wave of Dervishers actually made it to the wall! Gordon's men take their first losses to the tune of 6. The stout walls of Khartoum however soak up a lot of hits, sparing the defenders from much heavier losses.
Turn 5:The ladders go up and some Dervishers reach the gate itself but another 17 bite the dust! Such losses have completely soaked up all 67 of the Dervish reserves already (Due to the fact that I had only 133 for the attack and wanted a minimum of 200, I 'resurrected' that many casualties at the rear of the Dervish line). But the attackers get a measure of revenge when one of their two cannons strikes a Gate towers and kills both Egyptians! Their rifle fire however is totally inefficient with the defenders rolling 7s (+1 to roll for wall)!
Turns 6/7: At the left wall, the Dervishers make it to the top and in vicious hand-hand, 3 Egyptians go down to no losses for the Dervishers! Defensive fire at both walls however does drop another 21 including one poor Dervisher who reached the top of the wall just as the cannon fired it's last round!
At the right-hand wall the defenders have a better time of it. An additional Dervish artillery hit on another tower does take out a defender. Notice one lone 'fuzzy' who has made it alive to the parapet. He will lose his fight to those two Sudanese next to him. The four Egyptian gunners are falling back with their gun's breach mechanism with them, hoping against hope that the defense will hold.
Turns 8/9: Things are getting dicey for the defenders on the left wall. Seemed just as the defenders cut down the men climbing up onto the parapet, more would take their place. Each time there were fewer defenders left to shoot!
Over on the right, the Mahdi's men were cut down as fast as they appeared on the top of the wall. Some of the Sudanese from the extreme right were being redeployed to help out. Losses for both sides from rifle fire: 5 Dervishers and 3 Egyptians. Melee cost each side much more: 11 from the Mahdi's men and only 5 Egyptians (although most from the left).
Turns 10/11/12: Fighting desperately for their lives, the defenders are overwhelmed as more and more of the enemy pour over the walls. The last Egyptian (a drummer no less) goes down under the swords of 2 'fuzzies'. 
The Gate wall goes next as a lone Egyptian officer attempts to stem the tide (unsuccessfully).
Back at the right wall, the defenders are holding...just!
Turn 13: Khartoum is doomed. The Mahdi's men begin to pour down the ramp leading form the left wall, leaving the Sudanese on the right wall to perish in their hopeless stand.
So just as in the film, the Mahdi gains a victory. In our game, 76 defenders perished before the end while 154 Dervishers paid the final cost. The decision wasn't tipped until Turn 11 which was a bit of surprise so all in all, another good fight. Next we go to India and the tale of Gunga Din! Stay tuned, and remember, leave comments as I will appreciate your thoughts.

Tuesday, January 28, 2014

Battle of El Obeid: Khartoum

Continuing my preparation for Genghis Con this Feb, the following game was playtested. This is be the the view from the south, just as Hicks Pasha (hired by the Egyptian Government to destroy the Mahdi in the Sudan in 1883), has just turned his column around to head back to the Nile. Dervish forces are at the bottom and along the eastern edge of the battlefied, screened by hills in both cases.
The 'Fuzzy-Wuzzies' of the Hadendoa tribe were not actually fighting for the Mahdi yet, but we needed lots of troops for the Dervish army. They are located at the southern edge of the field:
Located at the northern part of the Mahdi's army are the mounted troops:
The Dervishers themselves hidden behind the eastern hills:
Hicks Pasha has just turned the column as already mentioned, so this used top be the tail of the column; some mounted Egyptians, Sudanese, and you just make out the leading element of the baggage train (which historically numbered some 5000 camels! I used one!)
The original head of the column on the right, with Hicks Pasha and staff on the left. Dervishers lurking behind the hills in the background:
Closeup of Hicks Pasha turning to his Egyptian staff, unaware of the impending disaster:
The battle commences with the Mahdi's forces racing towards their enemy. This is again the view from the north:
Turn 1: The Egyptians at the tail of the army deploy and begin to fire upon the advancing 'fuzzies', scoring 7 kills. A few shots ring out from the 'fuzzies' and amazingly two Egyptians are early kills! The Krupp gun is prepared to fire, while additional Egyptians fire on the Dervishers to the east, scoring 3 additional kills and a Shaken.
At the column's center, men are deploying against the threat coming form the east. The baggage train is moving to the west and supposed cover:
Finally at the head of the column, the troops prepare to receive the Dervish cavalry charge:
The End of Turn 1 sees Hicks Pasha cautiously optomistic. His men have inflicted a total of 24 kills on the Dervishers while losing a mere two of his own. A good start he thinks.

Turn 2, Hicks gets the second consecutive initiative roll:
At the tail, the 'fuzzies' make their charge, taking 5 kills and watching the cannon miss long over their heads. Two melees break out as the 'fuzzies reach the Egyptian line quickly. 8 tribesmen go down, but they take with them 9 Egyptians and 1 Sudanese. Things just got very sticky for Hicks! 
Back in the center, under the watchful eye of their commander, Sudanese pour deadly fire into the advancing Devishers, killing 10 tribesmen although two other kills were doubled (see rules in earlier post) Dervish rifle fire only drops 1 Sudanese before they crash into melee. Again the fight is bloody resulting in 5 more Egyptians with a loss of only 2 Dervishers. Hicks is beginning to get a little anxious, so he brings his reserves in front:
Things go better at the head of the column as the charging enemy cavalry are met with a devastating volley from the Sudanese and a counter charge by more Egyptian horse. 2 Sudanese foot soldiers and 3 Egyptian horse go down, but they bag 11 of the Dervishers! The End of Turn 2 sees casualties total 33 of the Dervisher and 25 Egyptian/Sudanese. 

Turn 3: and the Dervishers win the initiative.
View at the start of the turn:
Back at the rear of the column, surviving Egyptians are falling back attempting to keep their firing line intact. The 'fuzzies' however keep coming despite their losses! Egyptian fire scores 20 kills. (I've removed casualties to ease the play) and 4 more are shaken. There is bloody hand-hand however, and the Egyptians lose 30 men! They take down only 22 Dervishers! Ouch! The 'fuzzies' are breaking through! The Krupp lets go with a blast of canister which takes out 6 more 'fuzzies' and 1 unfortunate Sudanese in the wrong place at the wrong time!
At the column's center things are also falling apart. The first line of Sudanese has been overrun and the second line has taken significant losses:

At the column's head, the Egyptians continue to do well, although their mounted troops are nearly spent:
End of Turn 3, and Hicks' army is teetering. Losses to his men this round totaled 31 men. The Devishers lost 56, but there are still more coming!

At the start of Turn 4, the tail, center and head of the column looks like:


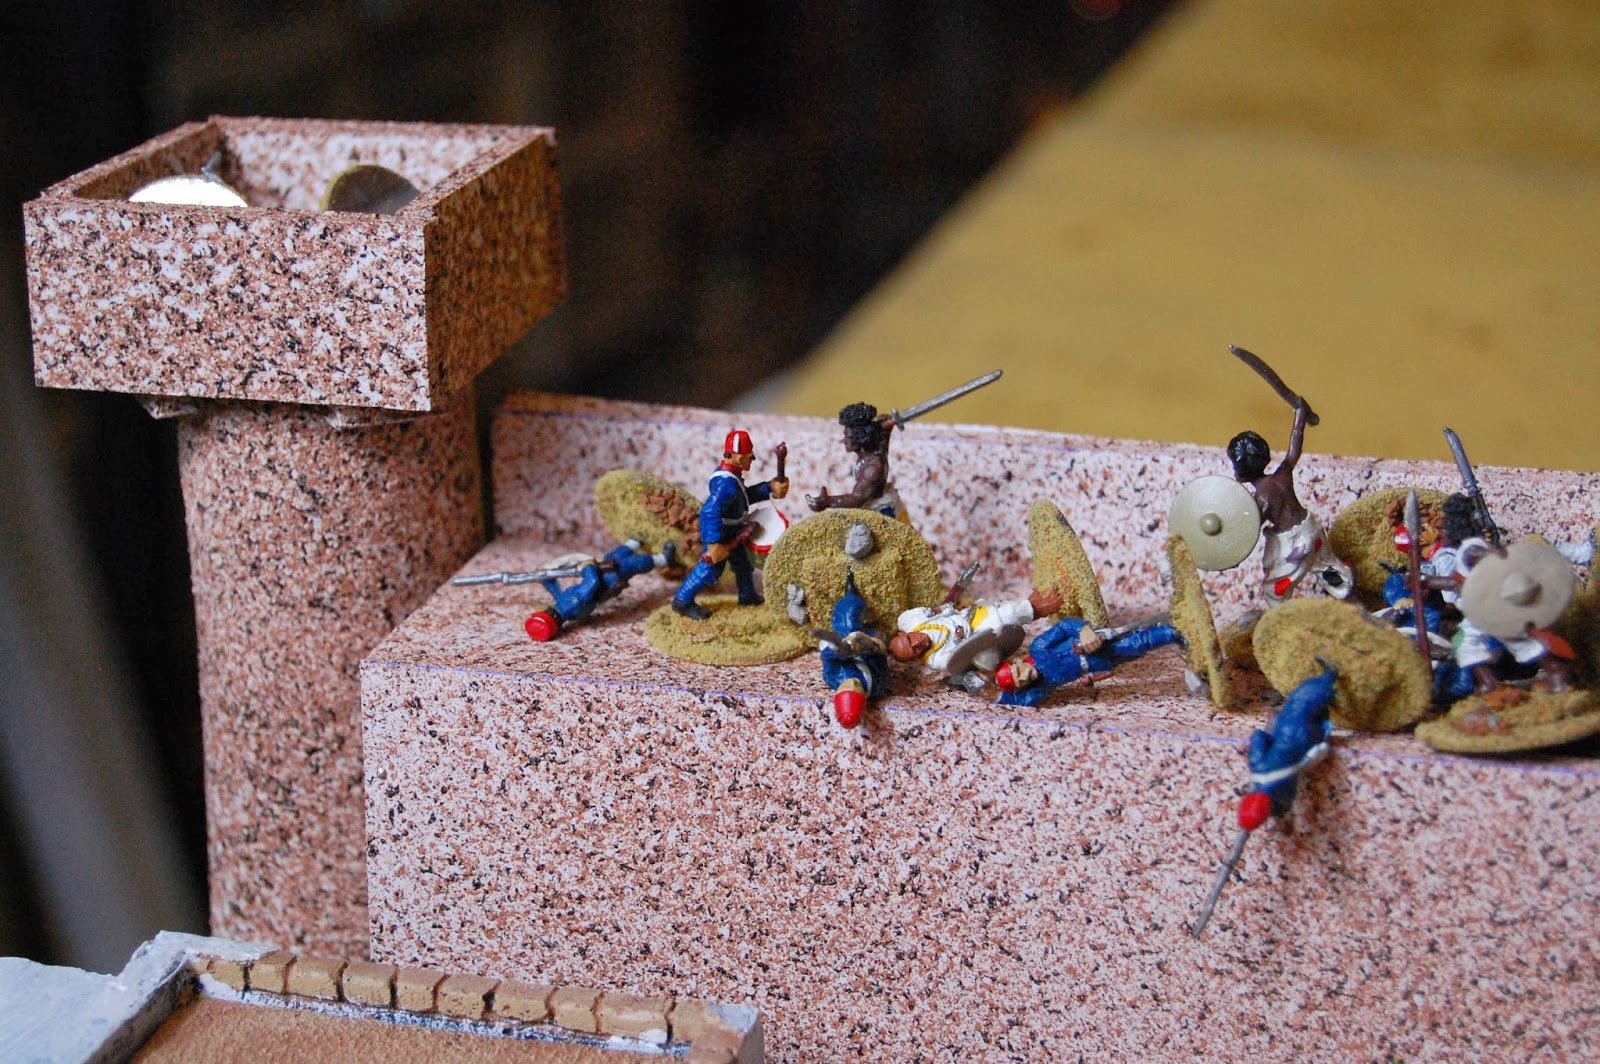
The 'fuzzies' soon swarm over the remaining Egyptians at the army's tail, while one lone soldier fights off 4 Devisher, causing one to be shaken with his fire, and then killing 3 more in melee! A brave man he:
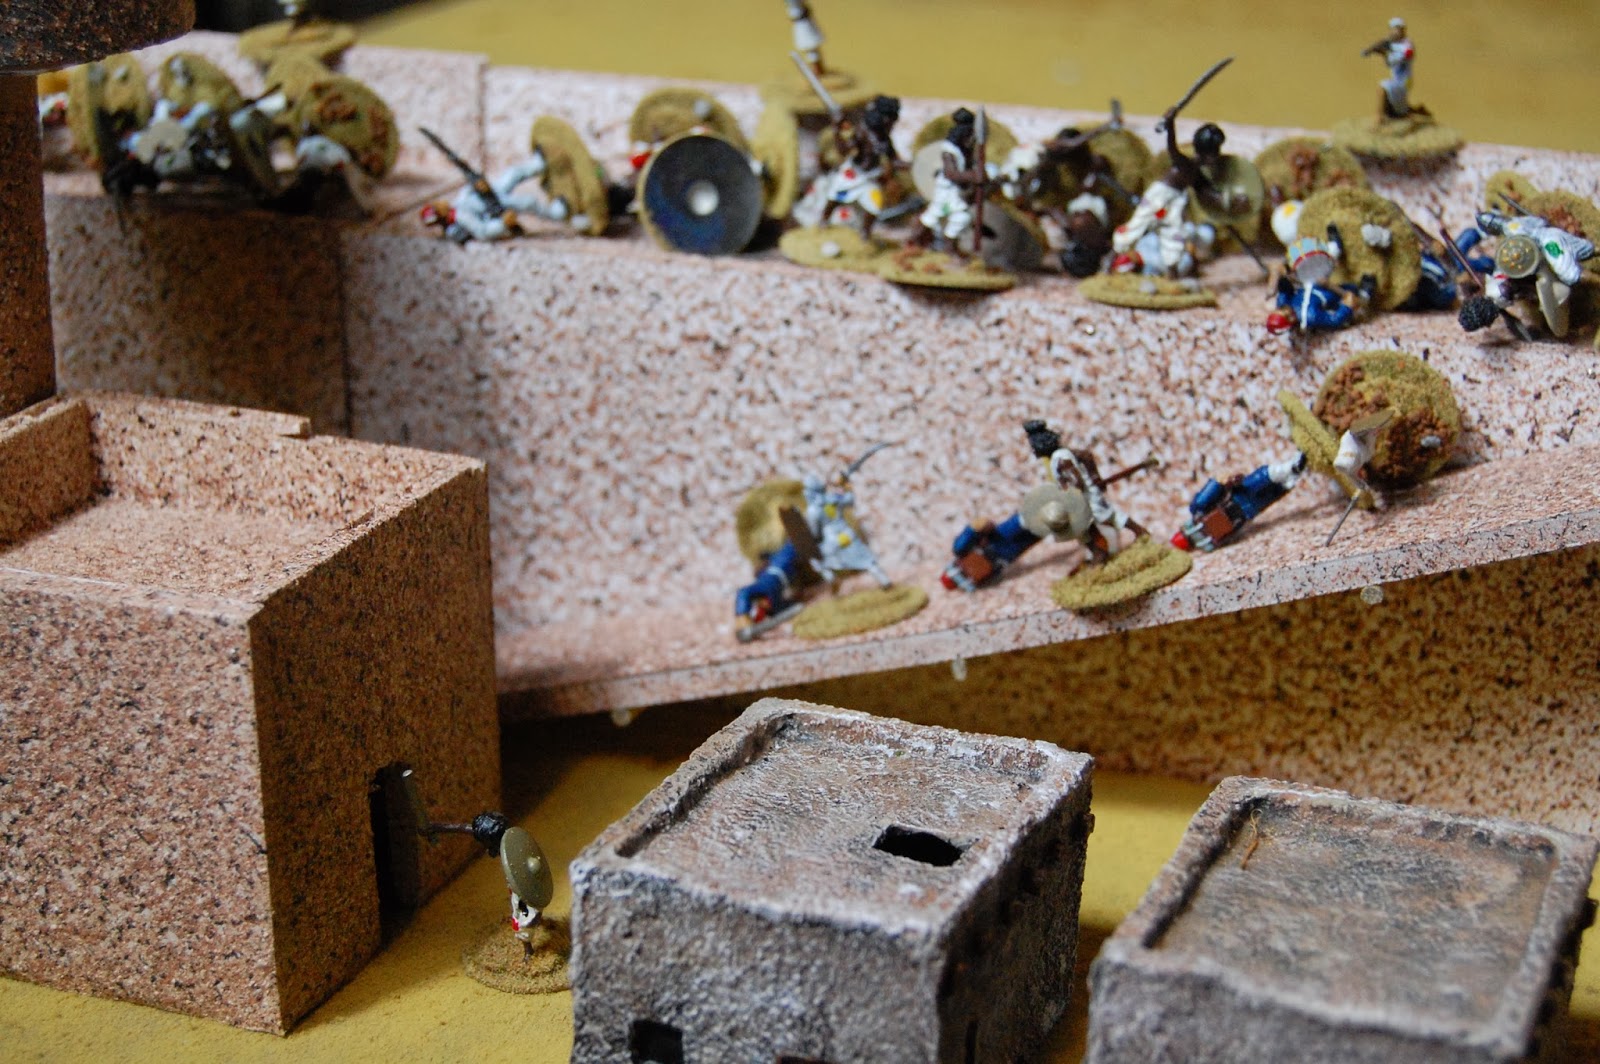
Fighting in front of their commander, Sudanese and gunners try to hold on desperately. Their fire scores  5 hits but too many of the 'fuzzies' and Devishers get through. In the resulting melees, 16 of Hicks' men go down along with 13 Dervishers: 
Back at the head of the column, the Sudanese have just about finished off the Dervishers on this part of the battlefield. The tribesmen lose 5 to fire and bayonet, while the Sudanese lose only one. The last Egyptian cavalryman takes down an enemy before he too loses his fight.
End of Turn 4 saw 20 more of Hicks' men go down, while the Mahdi has lost only 9 more.

Turn 5 and the Dervishers get the inititaive, not what Hicks needed. The end is rapidly closing in on the Egyptian army. First to go is the brave Egyptian holding his ground at the end of the column:
Then its Hicks' turn. He and his aide both cut down a 'fuzzie' but then pay the price. The center is destroyed:
The last stand occurs at the north end of the field. The surviving 13 Sudanese formed up and blazed away at the charging enemy, dropping 5! Then it was crashing swords, spears and bayonets. 7 Sudanese and 5 Devishers meet their end. The last Sudanese struggle backward, fire one last time but only one more Devisher is killed. They are overwhelmed!
Final tally for this big game was 20 mounted Dervishers, another 70 tribesmen on foot. An additional 61 'fuzzies' also were taken down. Of course Hicks' entire army was wiped out: 108 Egyptians and Sudanese. An enjoyable engagement even if the end was predictable. We recycled some 60 additional Dervishers to give the Mahdi a grand total of 207 men. Historically he had somewhere around 30-36,000 versus Hicks' approximate 10,000. Only some 500 Egyptians were believed to have escaped. The Mahdi had a great victory and recovered a great deal of modern equipment which he would turn on Khartoum. But that is another story. Stay tuned!

Sunday, January 26, 2014

Battle of Chokoti

Gaming notes. Green caps refer to elements which have fired and are reloading. Red cap designates a figure that is pinned but may shoot if loaded, while a yellow cap refers to a figure that is shaken and cannot move or shoot and who will surrender if brought to hand-to-hand. To shoot  one measures range; 1x6d per figure who must make on-target roll. If hit, a defender rolls his 1x6d to compare to the attacker's rolls (one for each hit). If the attacker beats the defensive roll, he gains a "casualty". If the attacker roll is equal, then a shaken, and less then one a pin. My system targets a group not usually a single figure (unless very close and small number of figures). Usually 6 to ten figures may be included. If there are three hits, three die are rolled and if any similar number comes up, then that figure is "hit" numerous times. Eliminates the god-like gaming effect that would allow each figure to quickly select his target in the confusion of a real battle. It seems to work and we joke about the poor fellow who gets hit numerous times! Hand-hand is simple. First a roll of inititive with 1x6d per figure involved. Winner rolls x6d first and if he gets a 4-6, he has "killed" the opponent. Hand to hand continues until one survives.

Turn 1: Brits win inititive and he selects elements on his right wall to fire. There are 4 hits resulting in 2 casaulties! But the first Sulistani element blazes away at the wall and gets 7 hits resulting in 2 kills and 3 Shaken! Bloody good shooting after moving! Sepoys on the towers range in and add another 2 kills and a shaken. The cannon blasts and gets two more (one poor bloke took a double blast!) while the left wall and gate guards sees the Brits and Sepoys add yet 4 more kills! Maybe they can stop the Sulistani after all! Return fire from the hillsmen drop 2 sepoys and pin a third. Some defensive rolls went as high as 7 or 8 (counting +2 for wall cover) Total for the first turn: 11 Sulistani and only 3 Sepoy. Photo illustrating the end of Turn 1:
Turn 2: 
Sulistani win the inititive and bring fire on the towers but to no effect. Under their covering fire, Sulistani rush forward with ladders against the right wall. British fire drop only 1 and add a Shaken. Not good as they'll reach the wall with those damn ladders! Sulistani cover fire then turn around and kill 2 Sepoys! Ouch! The British and Sepoy on the left wall get 1 Kill and 1 more Shaken, but it doesn't stop those tribesmen from reaching the wall with their ladders. Four Sepoys at the gate fire a round at long range and are rewarded with 2 kills and a Shaken! Hurrah! Remaining forces on both sides spend the turn reloading. Casualties for Turn 2: 4 Sulistani and 2 Sepoys. End of Turn 2:
Turn 3:
British win inititive. The Sepoys in the towers now attempt to sweep the Sulistani away from the base of the wall. Their shooting results in 4 Kills but there are more Sulistani pressing forward! The men on the walls add only 1 Kill and another Shaken, but the cannon crew score another Kill! Sensing the wall is going to fall, the Major (Errol Flynn of course) orders the remaining men to begin to fall back to the barracks (white building at end of parade ground. But will they make it? The Sulistani return fire only gets one Kill but it is the first British soldier. Some of the Sulistani are close to the top of the ladders! Casualites for Turn 3: 5 Sulistani, 1 Sepot and 1 Brit. End of Turn 3:

View from inside Chokoti:
Turn 4:
Winning the inititive the British player contiues to move some elements towards the barracks. Two Sulistani who reach the top of the wall are shot off to fall inside the parapet! Two more at another section however both survive point-blank fire from the Sepoys! But a brave Sepoy remains behind to give cover for his mates and cooly bayonets the Sulistani in the game's first hand-hand! Everyone else is reloading. Casualties for Turn 4: 3 Sulistani and 0 Brits! End of Turn 4:
The fighting on the wall is getting close!
Turn 5:
Sullistani win this inititive and more ladders hit the wall, this time on the left. The tribesmen's firing accounts for 6 Kills and a Pinned, including some in the towers, and 2 more Brits. That one hurt! Return fire get 3 Kills and a Shaken while some men retiring on the barracks get a long range Kill! But the best occurs when a Sulistani appears at the top of the wall right in front of the cannon...the gunner fires...and there is one less Sulistani! Casualties for Turn 5: 4 Sulistani, 2 Sepoy and 2 Brit. 
End of Turn 5: (note cannon blast)
Turn 6:
Bloody hell, the Sulistani win the inititive! 2 tribesmen on the wall shoot and kill one Sepoy, but miss the other! One British soldier remains to cover his mates and attacks a tribesman but falls to his sword! The wall has fallen! Sepoys from the towers are now withdrawing but one is killed, and two are shaken or stopped in place. It will make their successful withdrawal more difficult! Flynn is withdrawing with his men from the gate but can't get down the closest ladder. It's the artillerists! Move to the next ladder. His gun is the only one loaded...he fires...drops one Sulistani (naturally). The courageous gunner who blasted the Sulistani to pieces is unfortunately cut down by a tribesman's sword! Casualites for Turn 6: 3 Sulistani, 1 Gunner, and 2 Sepoys. End of Turn 6:
There is Flynn in center with his dead Sulistani at base of wall!
The Brits and Sepoys falling back to the barracks with the lone Brit in center on the wall soon to fallen under the tribesmen blades!
Turn 7:
Brits win inititive and the new firing line blazes away at the Sulistani who are atop the right wall. They only get 1 Kill and 1 Pin. The Sulistani return fire and get 2 Kills (and one was a double shot). The  unfortunate Sepoy in the tower is shaken yet again. It doesn't look good for him. Flynn covers for his men and stays at the top of the ladder to the parade ground. Casualties for Turn 7: 1 Sulistani and 2 Sepoys. End of Turn 7:
Flynn's rearguard stand:
Turn 8:
Sulistani get inititive and charge two tribesmen at our hero, Major Flynn! A meele occurs that goes 4 incredible rounds with neither side succeeding in dropping anyone although Flynn is wounded (and being a hero, I gave him an extra-strong constitution)! But, on the last try, the Sulistani pierce the brave heart of Flynn! After some initial poor shooting, the Sulistani finally get another Sepoy and 2 of the artillerists falling back towards the barracks. Return fire by the Brits/Sepoys gets 2 of the tribesmen. The Sepoy in the tower finally gets down to make his dash for safety! Casualties for Turn 8: 2 Sulistani, 1 Sepoy and 2 Artillerists. End of Turn 8: (Sorry I forgot to catch the end of Flynn on camera...I know...excitement and all. He lies at the base of the wall out of photo on left, while above, one of the Sulistani who got him lies "dead".
Turn 9:
With the majority of the British forces safe (at least for the moment) in the barracks we had both sides get one final blast at each other. The Brits must have been shaken by the loss of their beloved Major as they got 6 hits...but they all were inefffective! The Sulistani however dropped no less then five! Awful bad luck...so close to the barracks. 
Final Results: 
34 Sulistani out of 73 present
16 Sepoys/44
3 Artillerists/4
4 Brits/9
and of course Major Errol Flynn,
well I guess he won't be charging the Russinas at Balaklava Heights!
For those who have not viewed the film "Charge of the Light Brigade", the British were holed up in the barracks with little water. The tried to get word out during the night, but Captain David Niven was shot down boarding a native boat in the nearby river (that you must just make out in one of my original photos). The garrison surrendered but were treacherously shot down on orders of the Emir of Sulistan. I decided to end our game before all that came to pass. A 'jolly good fight' though. Hope you enjoyed it. Leave any comments you might have, I would appreciate it. If you happen to be in the Denver area, Feb 13, 2014, then come on by the Red Lion Inn where the Battle of Chokoti will rise again! May your die rolls always win out!