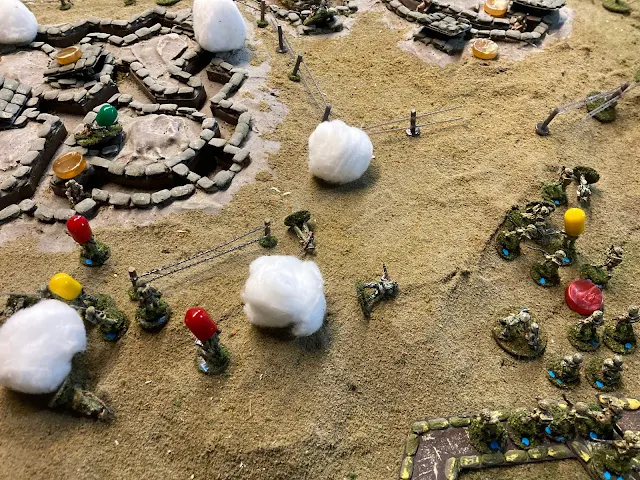
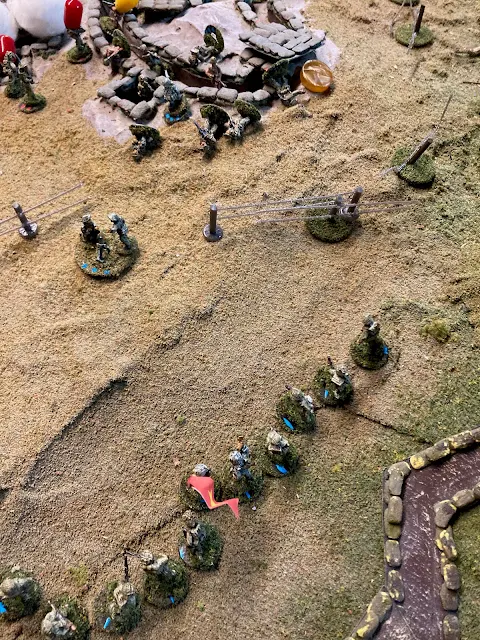
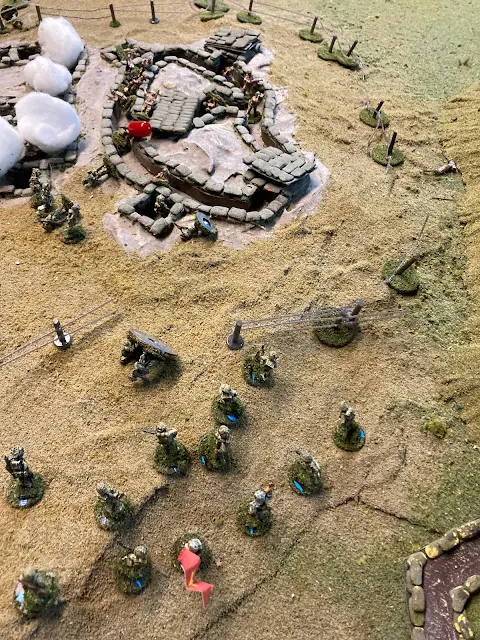
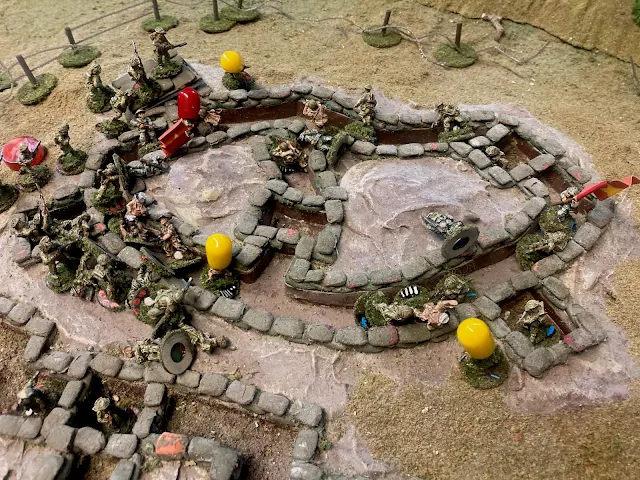
Following a short and inefficient artillery barrage, two fresh VM battalions swept out of their approach trenches. Then after the French missed most of their opening shots, the VM drew the Charismatic Leader Card, which gives the player a free activation for ALL units! This could be vital if the VM assault troops can move inside the expected French artillery barrage. Note there are only two Legionaire riflemen and a MMG facing this front..
The only result on the west side is a single VM Shaken! The French luck this round is terrible! But the VM commander realizes at the end of the Turn that a dramatic error has crept into the attack. The Battalion in the west was supposed to attack B2 (upper-center)and not B1 where it appears to be headed (bottom and center)! Someone will pay for that gaffe!
Finally, shots but no hits are exchanged over at B3...
Turn 20 started with a bang (ha) as the first card drawn was French and they chose the commander on B1. He succeeded in making contact through his battalion with the awaiting French artillery. Two companies of 120mm mortars responded. One fired on prepared area to the East of the stronghold and the VM took casualties. Some of the VM were more fortunate as they had reached inside the barrage...
On the NE quadrant, the French barrage succeeded also in bringing down the VM. The Viet commander began redeploying his men to their right to assault the correct target, but the forward elements on the left were out of contact and continued their advance (left and center)...
Then very unexpectently, the "Coffee Break" was drawn after only the one French activation card! The luck returned to the French!
Turn 21 saw French artillery and defensive fire (even though it was only two riflemen and one MMG) slaughter the VM. The Viets completely missed with their return fire...
Furthermore, the Viets who mistakenly assaulted B1 were now nearly wiped out. The only good news here for the VM is a 81mm mortar took out the LMG in the destroyed bunker. The rest of the assault company is now poised to begin their attack on the correct position....
On B3, one can say that the Legion is certainly not shy. Undercover fire from the LMG, the lone Legionaire rushes forward and guns down one of the two Viets in front of the captured command bunker. The LMG pins the other. Perhaps the Legion can regain B3!
VM inside B1 take down two of the Legion at point blank range (one survivor of the 'lost' company seen at right gets a Shaken) while the 2nd company approaches. Turn 22 ended so quickly that French artillery was not called in!
At B2, as the remainder of the 'lost' company pour through the wire, supporting VM 81mm mortar get a Shaken on an important LMG (and again, no French artillery!)...
On B3, the lone French LMG finally gets the VM next to him while the Viet officer goes to guide the 3rd Company which has been redirected towards the stronghold...
Turn 23 saw the French fail to call in close artillery (this time because of failed radio connection!) and as a result the Viets 2nd company got closer...
On B2, the Viets captured a LMG and others made it to the trench. Unfortunately French fire took down three VM who hadn't quite made it to the stronghold...
On B3, the Legion LMG didn't get to activate, so did not begin his withdraw to friendly B4...
By Turn 24 (6 hrs of fighting), B1 is in seriously trouble. Even with French barrage called on the outer trenches, t he 2nd VM company is well within the stronghold and has even assaulted the Command Bunker (top center). Hidden beneath the top shell smoke, is the lone Legion rifleman still fighting (although now Shaken by friendly fire!)...
Back at B2, things for the French took an upswing as artillery was finally called in successfully. A French counterattack w/n the stronghold has eliminated all but one Viet from the 1st company.
B3 has finally fallen. The lone Legion LMG made it to B4! (top center, between the two kepi blancs)
Turn 25: On B1, while a LMG tries to hold back the overwhelming VM, the Co, radio and MMG try to withdraw to B2. Note a Viet has already reached the bunker at the top right of photo, so they may be cut off..
Back on B2, w/o artillery fire, the Legionaires are hard-pressed to hold back the VM coming through the wire. On B4, the Co has now ordered the men to withdraw to B3 for a final stand. Their 82mm mortar is destroyed by incoming VM mortar fire...
On B1 on Turn 26, one lone Legionaire is manning his LMG and refusing to give up, making the VM pay dearly. (center/photo) The Radioman, Co, and MMG have been cut off, but inflicted further casualties on the Viets...
At B2, a Viet remains in the trench next to two others in the destroyed bunker. The French rolled well and inflicted numerous casualties and Pin/Shaken. As they fought, most of the 4th company has left B4 and is deploying in B2. The MMG in the destroyed bunker left of center was instrumental in raking the Viets flank. You can also just make out the Viet company commander at the bottom looking over the slim remnants of his force. He needs the 3rd Company who have been held up in the approach trenches...
The time ran out for the French Co on B1 on Turn 27 as he was KIA. The lone LMG was also Shaken which could lead to him being taking as a POW if he doesn't get activated before the VM next turn. Viets engaged the other two French in pointblank range...
The French counterattack has virtually destroyed the VM in B2. If the French draw the right activation next turn, they could end Viet resistance in that stronghold...
Turn 28 saw the VM trying to coordinate the final assault from three different companies as part of two separate battalions. The western most company, on its own began to push on while in the east, a company occupying B1 has moved its assault engineers to the front trench prior to its attack. Unfortunately the company moving up to B3 had missed an activation due to en early end to the last turn...
The remnants of the proud 3/13 DBLE also, were reorganizing B2 for the expected assault...
Turns 29-34 went by very quickly. With fewer cards in the deck, the "Coffee Break" would come up much faster. It made the decisions each side made regarding which unit to activate more challenging. You never knew when the turn would end.
It began with a brief VM barrage brought down on B2. No sooner had the last French MMG taken position in the bunker (top, near Yellow Cap), the a direct hit smashed it. The team was lucky to survive with light wounds. (Every time the French suffer a casualty, they roll a 6x to determine seriousness; 1-2 Light; 3-4 serious; 5-6 KIA. A 1-2 and the figure remains on station. while the WIA are taken to the company aid station. Only one Legionaire was KIA!
The Viet Assault engineers rush out and set their bangalores to tear the wire separating B1 from B2, while the VM await in the trenches. Ironically, this particular time, 0015 hours, was historically, when the last radio on B2 went dead. The French in this game are still holding...
French artillery fire was finally called down north of B2, catching the VM again and inflicting numerous casualties...
The Viets were extremely lucky this round as they pulled two activations then the Charismatic Leader to give all their units the free activation. the Viets north of B2 (bottom-right of photo) used it to their advantage. The Viets in B1 also rushed forward...
The Viets (marked with blue on their bases) swarmed into the trenches of B2 but failed miserably when they opened fire, missing four pointblank shots and only getting one Shaken. French fire (inc more artillery) devastated them. Meanwhile the company coming from B1 (left/photo) are filling the trenches of abandoned B4...
At the end of Turn 34, the Viets here are taking losses as well...
Turn 35 sees the 'Blue" btn bringing up btn troops to try to keep the pressure on...
The French commander is able to order two rounds of artillery brought down on B4, inflicting casualties on the Viets. The French then were able to get two platoons a free action that further hurt the VM (in addition to the Charismatic Leader, the other cards are a) MG, b) Lt/NCO get up to ten figures in one platoon, c) Pla Lt gets two platoons, and Captain who gets an entire company free activation) ..
The VM finally get an activation over at B3. Lucky for the French this turn ended when it did...the very next card was the VM Charismatic Leader Card!
Turn 36 and the "Blue Btn troops are reaching the wire as a handful of their compatriots are clinging to the stronghold...
The second round of the French artillery strikes empty ground...
The VM on B3 are using their own bodies to cross the wire (all their engineers are casualties)...
Turn 37 and only the Btn troops are left in the north, just coming through the wire...
Disaster for the French; actually two. A barrage of two rounds is called in, but in the first only one lands on target dropping one Viet. Then VM 81mm smashes the Command Bunker and the last French radio goes silent. Only 30 minutes later than history...
At Turn 38, the end is near with only 11 Legionaires remaining on Beatrice. Viets have reached the trenches in two spots, while yet mor VM approach now from B1...
Turn 39 and the French are down to 8 men. I didn't hel them that the VM pulled the Charismatic Leader again...
On Turn 40, the final French surrendered, all six of them. One was Pinned, one Shaken, and all were surrounded. Beatrice had fallen. General Giap's first assault has been successful and the 3/13 DBLE is no more...


No comments:
Post a Comment